
This PSEB 6th Class Computer Notes Chapter 4 Introduction to MS Paint will help you in revision during exams.
PSEB 6th Class Computer Notes Chapter 4 Introduction to MS Paint
Introduction:
MS Paint or Microsoft paint is an application software. This software is used to draw objects and shapes. The user can work with colours in this software. The drawings can be saved and printed. The drawing can also be used in other application software such as Microsoft Word, Microsoft PowerPoint.
What is MS Paint?
It is an application software developed by Microsoft. This software is provided by a company with Microsoft Windows operating system. It is the default software which is used to develop non commercial paintings. There are many different tools available in Paint. This software is very helpful for new users and children. The user can draw paintings in colour or black and white. This painting can be saved as bitmap files or other format. These paintings can also be printed on paper using a colour printer. These paintings can be set as wallpaper on the computer. These paintings can also be pasted in other applications like MS Word and MS PowerPoint. Save its painting in various formats such as JPG, GIF, BMP etc.
How to Start MS Paint?

Or
- Click on the start button on taskbar/ super bar. The Start menu will appear.
- Click on All Programs, another menu will appear.
- Click on the Accessories option in this menu. Another menu will appear. This menu has a Paint option.
- Click on the Paint option.
Or - Click on the start button and type “Paint” in the search bar. Click the Icon from the list and press enter key. Paint window will appear.
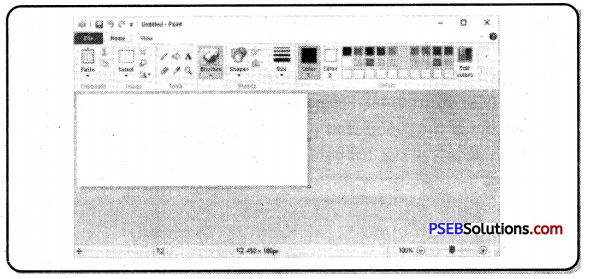
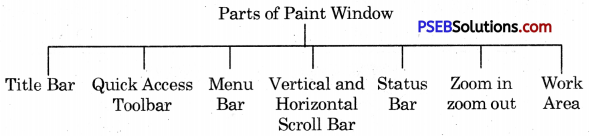
Parts of a Paint Window
Paint window is shown in above figure. It has following main parts:
1. Title Bar: The title bar is present at the top of the paint window. At the left end of the title bar, the first item shown is a little paint palette. If we click this button, a standard window menu opens having options Restore, Move, Size, Minimize, Maximize and Close. Another thing we will see the title of our picture followed by the name of the program-Paint. If we haven’t saved our picture, the name will be shown as “Untitled”.
- Quick Access Toolbar: The next four items make up the Quick Access Bar offering buttons for Save, Undo, Redo and Customize.
- Minimize, Maximize/Restore, Close: Title bar has three buttons on its right corner. They are:
(a) Minimize Button: Used for minimizing the paint window onto the taskbar.
(b) Maximize/Restore button: Used for maximizing or restoring the paint window.
(c) Close Button: Used for closing the paint window.
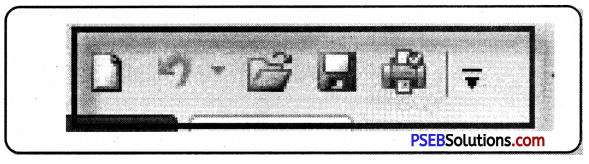
2. Quick Access Toolbar: It is a toolbar present in the title bar by default. This bar provides us with frequently used commands. Its position can be changed both to below or above the ribbon and icons can be added and removed as per the user’s requirement.
![]()
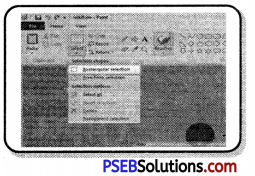
To Move Quick Access Toolbar below the Ribbon:
If we prefer to show Save, Undo and Redo buttons below the ribbon, Click on the “customize quick access bar” button and a menu will appear. Near the bottom of the menu that appears, we will see Show below the Ribbon. Click Show below the Ribbon.
The Quick Access Toolbar will move below the Ribbon. We can add more options such as New, Open, and Print Preview etc. to the Quick Access Toolbar with the help of Customize icon.
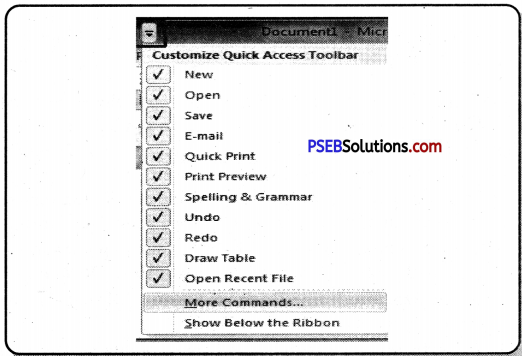
Move Quick Access Toolbar below the Ribbon
Here are commands and their functions discussed below:
| Name of Command | Function | Shortcut Key |
| New | Creates a new/blank image file. | Ctrl + N |
| Open | Opens a dialog box to open an existing image file. | Ctrl + 0 |
| Save | Saves changes to the current file. | Ctrl + S |
| Print the current picture. | Ctrl + P | |
| Print Preview | Displays the image on screen as it will appear after printing on paper. | |
| Send in e-mail | Send a copy of the picture in an e-mail as an attachment. | |
| Undo | Repeat or Reverse the last action. | Ctrl + Z |
| Redo | Restores previous undo action. | Ctrl + Y |
| Show below/ above the ribbon | Shows Quick Access Toolbar below or above the ribbon | |
| Minimize the ribbon | Toggle the ribbon On/Off. |
Adding Ribbon items to the Quick Access Toolbar: Many other items from the ribbon can also be added to the Quick Access Toolbar. On the Ribbon, right click on anything we like to add. A menu will appear which includes the option “Add to Quick Access Toolbar”. Click on this option.
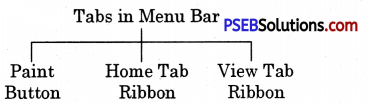
Menu Bar
The Menu bar has three tabs named as Paint Button, Home tab ribbon and View tab ribbon. On the right side of the menu bar, the Help button appears as shown in the figure below.
1. Paint Button: This Button appeared at the beginning of Menu bar. When we click on this button and the following Menu Appears.
The various commands given in Paint button are explained below:
| Name of Command | Functions |
| Save As | Save changes to the new file with a different file name. It asks for a new name every time. We can change format of the new file too. Such as PNG, JPEG, BMP, GIF etc. |
| From scanner and camera | Import picture from scanner or camera. |
| Set as desktop background | Set the current picture as our desktop background. |
| Properties | Change the properties of the picture. The Properties dialog will give us information about the picture . |
| Exit | To close the paint window. |
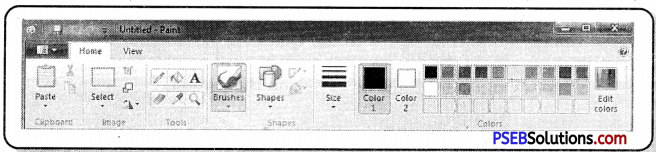
2. Home Tab Ribbon: All tools, shapes, colour palette and most of the commands are grouped together in the ribbon except Save, Undo and Redo commands which are shown at title bar or in the Quick Access Toolbar. Drop-down arrows below each item in the ribbon will give us other options for the tool. Most of the tools used for drawing or other tasks are present in Home Tab Ribbon.
There is also an option to minimize the ribbon. If we choose this, the ribbon d sappears entirely, but pops into view if you click on the Home tab.
3. View Tab Ribbon: We can use the View tab by clicking on it. The options such as zoom in, zoom out, show or hide and display are there in the View tab. Zoom in or out can be used alone or in conjunction with the Zoom Tool. We can also use the status bar for Zoom in or Zoom out purposes.
![]()
Scroll Bar
Scroll bars are used to move the screen. These are of two types:
- Horizontal Scroll bar: It is present at the bottom of the Paint window. It moves the screen left and right.
- Vertical Scroll bar: It is present at the right side of the Paint window. It moves the screen up and down.
Status Bar

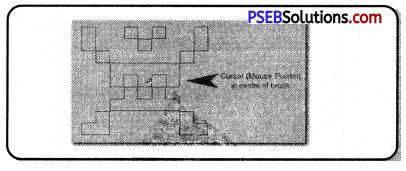
1. Cursor Position: It gives the Cursor Position, which is helpful when we want to position any picture precisely.
2. Selection Size: It shows the size of a selection we are making or size of an object we are drawing.
3. Image Size: It shows the size of our entire picture, even if the picture is very large and is not visible completely in the window. If we have not changed the units in the Properties dialog box, the measurement will be displayed in pixels. We can change measurement to inches or centimetres.
4. Disk Size: Once we have saved our picture, this option will show the size or drawing on Disk. If the paint window is very small, this figure might not be shown.
5. Zoom Slider: The Zoom Slider is convenient if we are working in a zoomed in view and want to zoom out. However, we cannot zoom in on a particular spot, as we can do with the Magnifier.
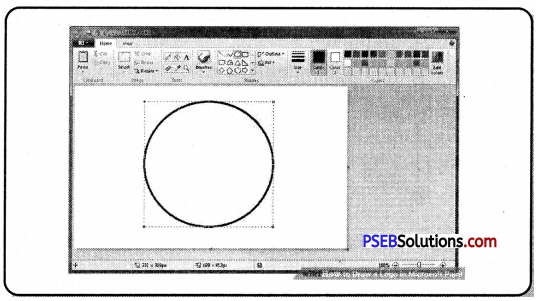
Work Area
Free space of the Paint window is called the work area. It is used for making drawings. This area is usually between Ribbon and status bar.
Saving Our Drawing
It is good to save our picture as soon as we begin to work. We must click on the Save button on the Quick Access Toolbar every few minutes. This prevents loss of work if the program closes unexpectedly, as in a power failure.
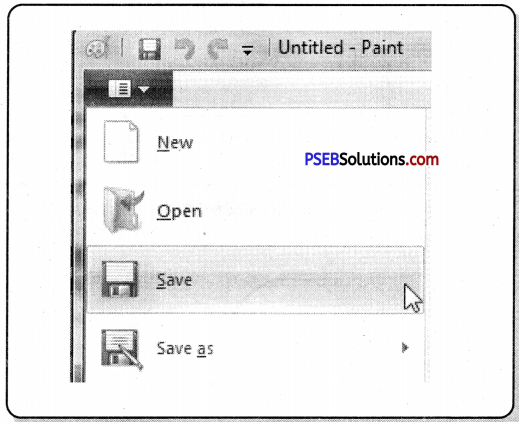
When we click the Save for the first time, we will find a dialog box where we have to type a name for the picture. Type a desired name in the file name text box and click the Save button.
Save as:

Click Save as in file menu.
With the help of Save as option we can save a Copy of a picture with another file name. Go to the Paint button and open the menu.
In the dialog box, just change the existing name then click the Save button.