
This PSEB 7th Class Computer Notes Chapter 2 Windows Explorer will help you in revision during exams.
PSEB 7th Class Computer Notes Chapter 2 Windows Explorer
Introduction:
Windows Explorer is an important part of Windows. It manages files and folders. You can cut, copy, paste, rename and delete your files and folders. Explorer puts your files and folders in the correct order.
There are two types of Explorer:
- Windows Explorer
- Internet Explorer.
Windows Explorer:
The main function of Windows Explorer is to provide a graphical interface for navigating the computer’s hard disk and associated media. It is used to view, organize and manage the files / folders on the computer’s hard disk. Windows Explorer is automatically launched any time you open a folder in Windows XP.
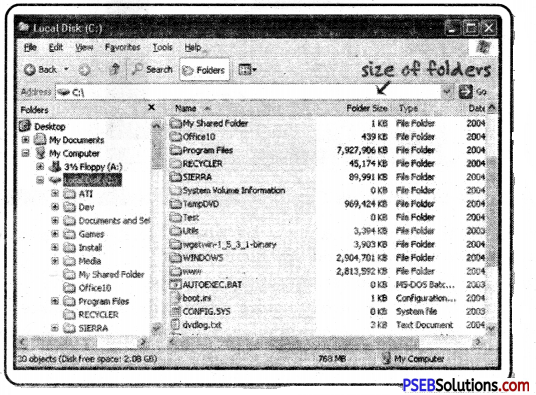
Windows Explorer is also called File Explorer. It is used to view files and folders on our computer. We can open the data, folder and library of the disk in the computer and also search for an item. We can use it to open, delete, rename, copy, move and create new folders.
Opening the Windows Explorer
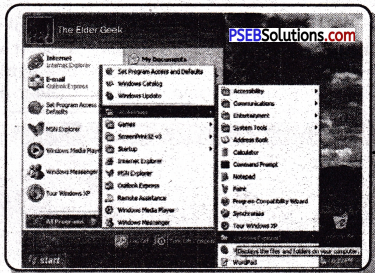
We can open Windows explorer in many ways. Some of these are as follow:
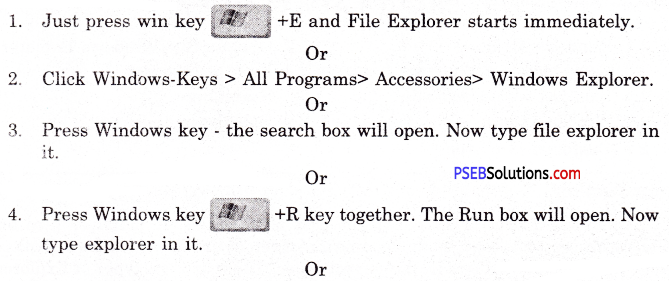
Or
By default, Windows 10 includes a File Explorer shortcut on the taskbar. Its icon looks like a folder. Click or tap on it and File Explorer is opened.
Components of Windows Explorer
Components of the windows explorer are files, folders, and drives. With the help of Explorer we can easily find any file or folder.
- File: File is the smallest unit of data storage.
- Folders: Folders are used to store related files in one place.
- Drive: Hard disk storage areas are called drives. For example Local Disk C, D, E, F, and G: drives.
With Windows Explorer we can easily access files, folders and drives. Windows Explorer is divided into following parts.
- Left Pane: This is called the navigation pane. Here we can see drives, files and folders
- Right Pane: When a file, folder is selected, its details appear in the right pane.
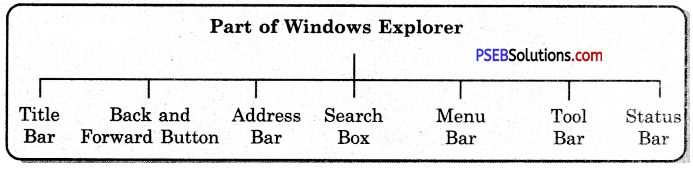
- Forward and Back buttons: Enables you to go to folders you’ve already opened. If you go to a different folder, you can choose the Back button to return to the last folder you accessed.
- Address Bar: Enables you to go to a different folder in the same Explorer window.
- Search Box: Allows you to search for subfolders, documents, images, programs, Web pages, and bookmarks in the current folder.
- Status Bar: Displays information about a selected folder and its contents, such as the total number of items in the folder, the number of items selected and total file size.
- Ribbon: Enables you to perform layout, formatting, and sharing tasks, as well as how File Explorer displays your files and folders.
![]()
Series of Locations:
The folders and drives in the computer, the computer connected to the network and its shared folders, drives and printers are arranged in a tree shape. This sequence is called a series of locations. It contains the following items:
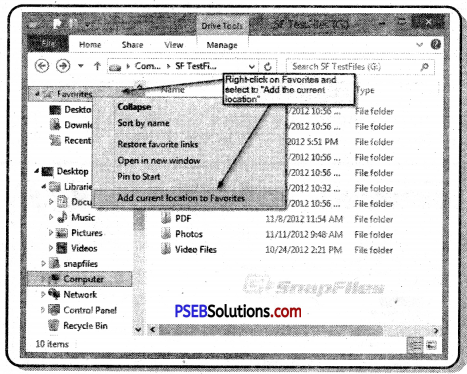
Favorites: The top most folder in this series is the Desktop folder. It contains desktop, downloads and recent place items.
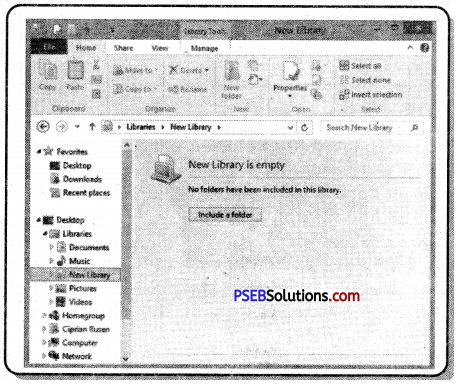
2. Library Folder: By default this folder contains four libraries, such as; Documents, music, photos and videos. These folders contain related items; Such as pictures in pictures folder, related videos in video folder, etc.
3. Personal Folder: Your personal folder is named after the user name to which you have logged in to the computer and by default it contains the following folders; such as Contacts, Downloads, Favorites, Links, My Documents, My Music, My Pictures, My Videos, Saved Games and Search.
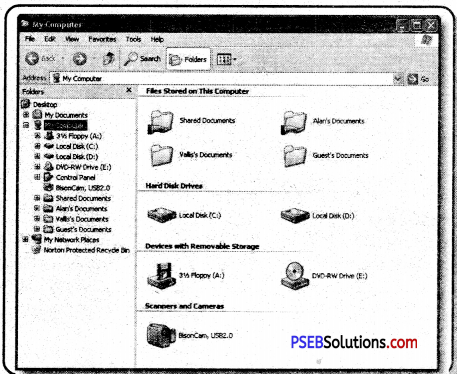
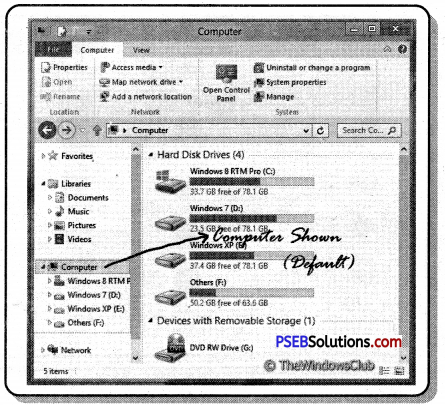
4. MY Computer: Disks in a computer; such as C: drive, D: Drive, E: Drive etc. and other connected devices such as Printer, USB, memory stick and camera are attached to the computer, they are visible here.
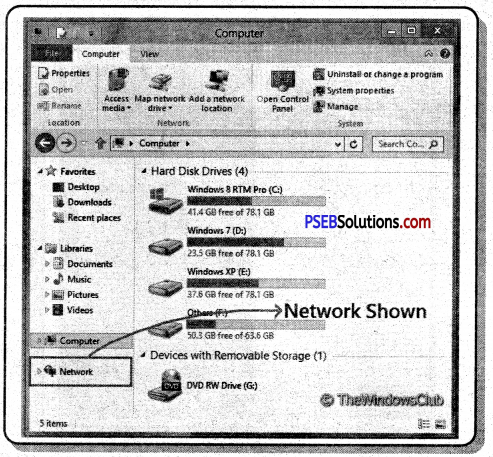
5. Network: If you are connected to a local network, you see other computers and devices in it.
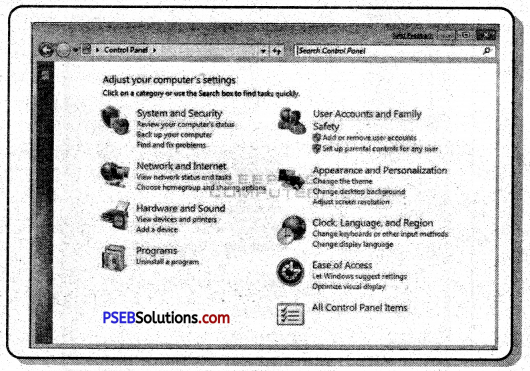
6. Control Panel: Control Panel is used to configure hardware and software of computer system and to change settings of computer system.
7. Recycle Bin: It contains deleted files/folders or programs.

View means how files and folders appear in a computer system. Explorer views show the direction in which files and folders will appear. It has five types of views. These are thumbnails, tiles, icons, lists and details.
- Small, Medium, Large and Extra Large Icons View: Items in this view are in more than one row and each item appears in the shape of an icon. Each item has a name.
- Tiles Icon View: Items in this view are in more than one row and each item appears in the shape of an icon. Each item has a name. It contains other information, such as the type of file and its size.
- List Icon View: Items in this view are in more than one column. Each item has a name and the icon is to the left of the name.
- Content Icon View: Items in this view appear in the column. Each item is in the shape of an icon. It has a name and type of the file is written below it. Some other properties such as modification date and size below it are also visible, By default this view is used for search.
- Detail Icon View: Each item appears as a table row. The first column contains the name of the item in the form of a small icon and the rest of the column lists its properties such as its size and the date and type of modification.
![]()
Change Display for a Single Folder
- Open File Explorer.
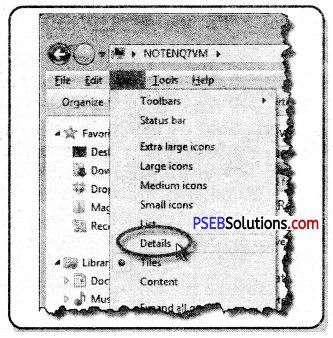
- Click the View tab at the top of the window.
- In the Layout section, select Extra large icons, Large icons, Medium Icons, Small icons, List, Details, Tiles, or Content to change to the view you want to see.
There are many different types of files you can use. For example, Microsoft Word documents, digital photos, digital music, and digital videos are all types of files. When you use different applications, you’ll often be viewing, creating, or editing files. Files are usually represented by an icon. In the image below, you can see a few different types of files.
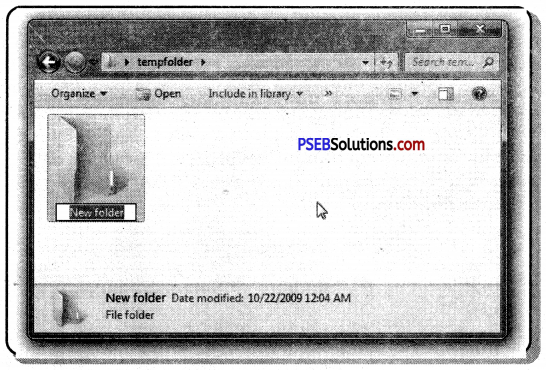
Windows uses folders to help you organize files. You can put files inside a folder, just like you would put documents inside a real folder. In the image below, you can see some folders on the desktop.
Selecting the Items
Usually before doing any work on a file or folder such as opening a file, closing a file, deleting file, copy a file etc. we have to select it. There are different ways to select a single file/folder or multiple files/folders.
1. Selecting a Single Item: If more than one item is available and you want to select one of the items in it, it can be selected by clicking with the mouse on that file.
2. Selecting More Than One File ; There are a few ways to select more than one file at a time:
(a) If you’re viewing your files as icons, you can click and drag the mouse to draw a box around the files you want to select. When you’re done, release the mouse; the files will be selected. You can now move, copy, or delete all of these files at the same time.
(b) Selecting All Items: If you want to select all files in a folder at the same time, open the folder in File Explorer and press Ctrl+A or click “Select all” option from the “Select” group on the Home tab. All of the files in the folder will be selected.
(c) Select items using the Shift key: To select a group of files from a folder, click the first file, press and hold the Shift key on your keyboard, then click the last file. All of the files between the first and last ones will be selected.
(d) Selecting an item using (Ctrl key): To select specific files from a folder, press and hold the Control key on your keyboard, then click the files you want to select.
3. Reverse selection: To reverse the selection, select the “Invert Selection” option in the Edit menu.
Creating a Folder
If you want to create a new folder, it is created in the current location. Here are some ways to create a folder:
- Open the File explorer, click on the “New Folder” button option.
- The new folder will appear. Type the desired name for the folder and press Enter.
Or
Press the Ctrl + Shift + N keys together from the keyboard. The new folder will appear. Type the name of the folder and press Enter key.
Or
Right-click on a blank space, click “New” ⇒ “Folder” in the context menu. The new folder will appear. Type the name of the folder and press Enter key.

Or
- Place the cursor where you want to add your folder.
- In File Explorer, click on the Home menu item.
- From the Home riibbon, click on the New folder button.
- Enter the name of your new folder and press enter key.
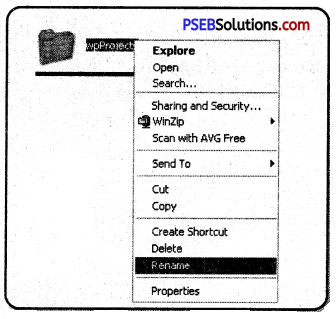
Re-naming the Item
You can change the name of any file or folder. Here are the steps to rename an item:
- Click the file or folder, wait about one second, and click again. An editable text field will appear.
- Type the desired name on your keyboard and press Enter. The name will be changed.
Or - You can also right-click the folder and select “Rename” copy option from the menu that create shortcut appears. An editable text field will appear.
- Type the desired name from , keyboard and press Enter. The name will be changed.
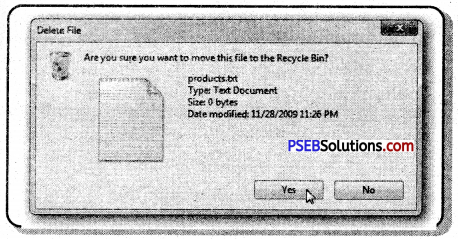
Delete a File or Folder
If you no longer need to use a file, you can delete it. When you delete a file, it is moved to the Recycle Bin. If you change your mind, you can move the file from the Recycle Bin back to its original location. If you’re sure you want to permanently delete the file, you will need to empty the Recycle Bin.
Following are the Steps to delete file/folder:
- Select the file or folder you want to delete.
- Press the Delete key from the keyboard. A message will appear asking for deletion.
- Click on “Yes”. Item will be deleted.
Or
- Click and drag the file to the Recycle Bin icon on the desktop.
- To permanently delete the file, right click the Recycle Bin icon and select “Empty Recycle Bin”. All files in the Recycle Bin will be permanently deleted.
![]()
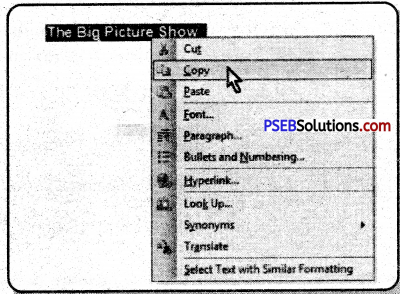
Copying or Pasting Items
To copy a file/folder the steps are as follow:
- Select the item to be copied.
- Select the “Copy” option from the “Clipboard” group on the “Home” tab.
Or
Press ctrl + c keys from the keyboard.
Right click on the file/folder you want to copy. A menu will open. From this menu select “copy” option. Now your file/folder will be copied.
Steps to paste the file/Folder are as follow:
- Place the cursor where you want to paste the file/folder.
- Select the “Paste” option from the “Clipboard” group on the “Home” tab.
- Your copied item will now be pasted.
Or
Press the Ctrl + V key from the keyboard.
Or
Locate and right-click the desired location, then select “Paste” option from the menu appeared.
Move Items by Cut and Paste
Move items from one place to another is similar to copy and paste but in this the cut option is used instead of copy. The important difference between copy / paste and cut / paste is that when we copy and paste an item, a duplicate item of that specified item is created in a new location which does not move from its original location. An item moved by cut or paste does not move from its original location but moves to its original location.
Cut and paste is used as follows.
- Select the item to be cut.
- Select the “Cut” option from the “Clipboard” group on the “Home” tab.
Or
From the keyboard Press the Ctrl + X key.
Or
Right-click the mouse and select Cut from the menu that appears. Steps to paste the file/Folder are as follow:
- Place the cursor where you want to pasite the file/folder.
- Select the “Paste” option from the “Clipboard” group on the “Home” tab.
- Your copied item will now be pasted.
Or
Press the Ctrl + V key from the keyboard.
Or
Locate and right-click the desired location, then select “Paste” option from the menu appeared.
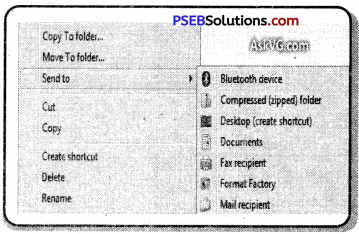
Copying Items with Send To
The Send to Option is an easy way to copy one or more items or programs to a new location. Following are the steps to use Send to option:
- Select the item to be copied.
- Press the right mouse button; select the option “Send To” from the menu.
- Now select the specified location. By default, the Send To submenu contains the following locations:
(a) Compressed (zipped) Folder
(b) Desktop (Create Short-cut)
(c) Documents Library
(d) Fax and Mail recipients
(e) Removable devices, such as: USB, Memory Sticks Select the option as needed.
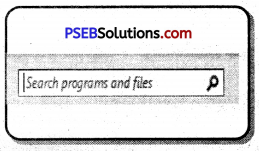
Searching
Search commands can be used to find files, folders, etc. Sometimes we save an item and forget its location and in the future when we need that item we can’t find it, but with searching we can easily find our item we search for.
- Press the Ctrl + E key from the keyboard in Windows Explorer or click in the search box that appears in Windows.
- Type one or more search terms. If you use more than one search term, vour file must match those search terms.
- The results appear automatically in the item view as you type the search term. We do not need to press Enter key to do this.
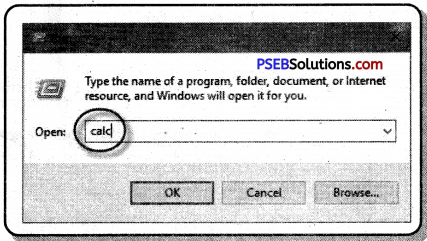
Run Command:
The run command is obtained by clicking on Start button. Run commands are used to run a program or open folders and documents directly. Steps to use Run command are as follow:
1. Click on Start button.
2. Select All apps and expand Windows System, then click Run to open it. The run box will open.
Or
Just press the Windows key and the R key (win+R) at the same time, it will open the Run command box immediately.
Or
Type the word run inside search box in the taskbar, and then click Run from the search result. A Run dialog box will appear on the screen.
To open any program, type name in Run dialog box and click Ok. For Example type “Calc” to open the calculator.
Calculator:
Calc is the name of the spreadsheet program used in OpenOffice. A Calculator is an electronic hardware device or software capable of performing mathematical calculations, such as addition, multiplication, subtraction, or division. The calculator can also be used to calculate dates, convert currency, and if you’re using the Standard mode, you can keep the calculator window on top of other windows.
The steps for opening the calculator are as follows:
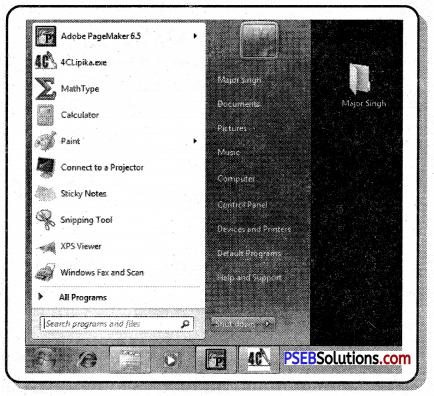
1. Click Start.
2. In the programs list, find and click the Calculator program.
Click Start.
Type “calc” in search box and press Enter.
Or
Press the shortcut keys Windows key+X.
In the Power User Task Menu, click the Run option.
Type “calc” in Run box and press Enter.

Customize Desktop:
Customizing is the process of changing the settings of a desktop.
Themes:
Themes are a combination of pictures, colors, and sounds. It has background, screen saver, border color and sound scheme.
Windows has the following themes:
(a) My Themes
(b) Arrow Themes
(c) Basic and High Contrast Themes
Following are the steps to apply the theme:
- Open Settings.
- Click on Personalization.
- Click on Themes.
- Click the Get more themes in the Microsoft Store option.
- Select the theme you want.
- Click the Get button.
- Click the Apply button.
- Click the newly added theme to apply it from the “Themes” page.
![]()
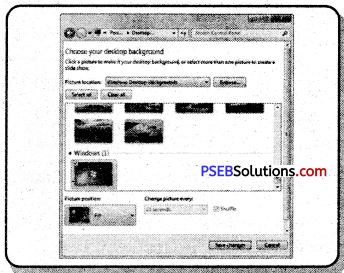
Desktop Background
It is a wallpaper image that appears behind the icons on your computer’s desktop. It can be in JPEG or Gif format. The following are steps to change the desktop background:
(а) Right-click the desktop and choose Personalize from the shortcut menu. The Personalization window appears.
(b) Click the Desktop Background link. The Desktop Background dialog box appears.
(c) Select a category of desktop background options from the Picture Location list box and then click the image from the background preview list that you want to use.
(d) The background is previewed on your desktop. Click Save Changes.
Screen Saver:
Screen saver is the graphics that appear on the screen after not working on the computer for some time. It is used for security and protection of the screen. We can set our own screen saver.
Steps to set the screen saver : Here are the steps to set up a screen saver
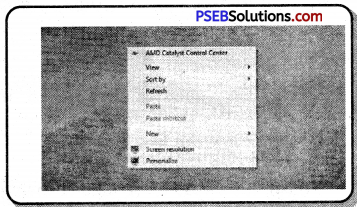
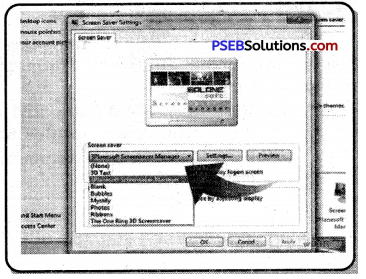
(a) Right-click the desktop and choose Personalize from the shortcut menu. The Personalization window appears.
(b) Click the Lock Screen option. The lock screen dialog box appears.
(c) In the Screen Saver Settings window, choose a screen saver from the drop-down list.
(d) Click on the Preview button to preview the screen saver.
(e)The screensaver has to be set to run auto-matically from the desktop. So type the time setting in the Wait option that appears in the picture.
(f) Click on Apply button and press Ok button.
Note:
- Windows Explorer is an important part of Windows. It manages files and folders.
- Windows Explorer is also called File Explorer. It is used to view files and folders on our computer.
- Win key + E is used to open window Explorer .
- File is the smallest unit of data storage.
- Folders are used to store related files in one place.
- Hard disk storage areas are called drives.
- On navigation pane, we can see drives, files and folders
- Address Bar enables you to go to a different folder in the same Explorer window.
- Search Box allows you to search for subfolders, documents, images, programs, Web pages, and bookmarks in the current folder.
- Control Panel is used to configure hardware and software of” computer system and to change settings of computer system.
- Recycle Bin contains deleted files/folders or programs.
- Explorer views show the direction in which files and folders will appear. O Explorer has five types of views.
- Thumbnails, tiles, icons, lists and details views.
- Ctrl+A keys are used to select all files and folders in explorer windows.