PSEB 10th Class Computer Notes Chapter 5 Desktop Publishing

This PSEB 10th Class Computer Notes Chapter 5 Desktop Publishing will help you in revision during exams.

PSEB 10th Class Computer Notes Chapter 5 Desktop Publishing

Desktop publishing is a term coined after the development of a specific type of software. It’s about using that software to combine and rearrange text and images and creating digital files. Desktop publishing (also known as DTP) combines, a personal computer and WYSIWYG(What You See Is What You Get) page layout software to create publication documents on a computer for either large scale publishing or small scale local multifunction peripheral output and distribution.
PSEB 10th Class Computer Notes Chapter 5 Desktop Publishing

Desktop Publishing:

The term “desktop publishing” is commonly used to describe page layout skills. However, the skills and software are not limited to paper and book publishing. The same skills and software are often used to create graphics for point of sale displays, promotional items, trade show exhibits, retail package designs and outdoor signs. Desktop publishing refers to the act of using software on a personal computer to combine mixed-media elements such as text, photos, or charts into printable documents.

Once created, these documents can either be printed on a home printer or outsourced to a professional printing service. One of the key features is the ability to preview a page layout before prior to printing, via a feature called What You See Is What You Get (WYSIWYG), pronounced wizzy-wig. While this Was once taught through advanced education programs, advancements in software means that the process is less difficult to master than in past decades.

Definition of DTP

Desktop publishing is the process of using a computer and specific types of software to combine text, images and artwork to produce documents properly formatted for print or visual consumption.

DTP opened visual communication to all with the advent ofdesktop publishing software and affordable desktop computers, a wide range of people, including non-designers and others without graphic design experience, suddenly had the tools to become desktop publishers.

Freelance and in-house graphic designers, small business owners, secretaries, teachers, students and individual consumers do desktop publishing. Non-designers can create visual communications for commercial digital printing, printing on a printing press, and for desktop printing at home or in the office.

PSEB 10th Class Computer Notes Chapter 5 Desktop Publishing

Visual Communication using DTP

Now, anyone can do desktop publishing. We dont need any professional for that. Designing and printing both are included in desktop publishing but usually it is considered a process of creating a digital file of product only.

Desktop-Publishing Software:

The primary software used in desktop publishing is page layout software and web design software. Graphics software, including drawing software, a photo editor and word processing software, are also important tools of the graphic designer or desktop publisher. The list of available software is lengthy, but some software is seen on just about everyone’s must-have list depending on what they are trying to accomplish.

Page Layout Software for Printing:

  • Adobe InDesign
  • PagePlus Series from Serif
  • QuarkXpress

Page Layout Software for Office:

1. Microsoft Office Suite Apple iWork Suite

Graphics Software:

  • Adobe Illustrator
  • Corel Draw
  • Inkscape

Photo Editing Software:

  • Adobe Photoshop
  • Corel PaintShop Pro

Web Design Software:

  • Adobe Dreamweaver CC
  • Adobe Muse

PSEB 10th Class Computer Notes Chapter 5 Desktop Publishing

Word Processing and Desktop Publishing:

The similarities between the two are:

  • Both deal with text that can be formatted.
  • Both can work with tables and pictures.
  • Both have many similar features like WordArt, Clip Art, and text styles.

The Differences between DTP and Word Processing:

Word processing involves creation, editing, and printing of text while desktop publishing involves production of documents that combine text with graphics. Word processing is difficult to layout and design as compared to desktop publishing. Thus, desktop publishing is used to work on things like newsletters, magazines, adverts, and brochures where layout is important. Word processing documents are common for simple memos, letters, manuscripts, and resumes.

The difference between desktop publishing and word processing software is as follows:

Desktop Publishing Word Processing
1. DTP involves production of documents that combine text and graphics.

2. Layout designing is easy.

3. Main products are newsletter, magazines adverts etc.

4. They involve more graphics.

5. Its products are coloured mainly.

Word processors deals with creation, edition of text.

Layout designing is difficult.

Main products are documents and resumes.

They involve more text.

They are used to get black and white documents.

Wysiwyg Feature:

A WYSIWYG is a system in which content (text and graphics) can be edited in a form closely resembling its appearance when printed or displayed as a finished product, such as a printed document, web page, or slide presentation. WYSIWYG is especially popular for desktop publishing.

With desktop publishing, we can increase productivity, minimize production cost, enhance the appearance of our documents, improve the level of creativity, reduce the time taken for printing and produce customized documents. The best part about DTP is that we can create professional-looking documents, without the need for graphic designer.

PSEB 10th Class Computer Notes Chapter 5 Desktop Publishing

Graphics:

A graphic is an image or visual representation of an object. Therefore, computer graphics are simply images displayed on a computer screen. Graphics Eire often contrasted with text, which is comprised of characters, such as numbers and letters, rather than images.

Computer graphics can be either two or three-dimensional. Early computers only supported 2D monochrome graphics, meaning they were black and white. Eventually, computers began to support color images. While the first machines only supported 16 or 256 colors, most computers can now display graphics in millions of colors.

Bitmap or Raster Graphics

Bitmap graphics consist of many tiny dots called pixels. It is possible to edit each individual pixel using bitmap graphics software like Adobe Photoshop. Examples of bitmap graphics are a digital photograph or a scanned image. The amount of detail we can draw depends on the number of pixels per square inch (PSI). Since the computer has to store information about every single pixel in the image, the file size of a bitmap graphic is often quite large. When we resize a bitmap graphic, it tends to lose its quality.

Vector Graphics

Vector graphics are based on control points which are connected by lines and curves called vector paths or vectors. Vector paths can be used to make shape objects. It is possible to edit each shape object separately, for example, to change the shape, outline type (stroke), fill, size or position.
PSEB 10th Class Computer Notes Chapter 5 Desktop Publishing Notes 1
The difference between vector and bitmap graphics is as follows :

Vector Graphics Bitmap Graphics
1. Vector Graphics are passed on Vector Paths

2. They do not lose quality

3. The file size is less

4. These are used in advanced programmes

They are based on Pixels

They lose quality when expended

The file size is more.

These are used for basic programmes

Margins:

A margin is the area between the main content of a page and the page edges. The margin helps to define where a line of text begins and ends. A page to include top, Bottom, Left and Right margin.

The default margins are usually defined as one inch on all sides. However, depending on the requirement, the margins may vary. These margins create a frame around the content of the page so that the text does not run all the way to the edges. The white space along the edges of the document makes the page look cleaner and the text is easier to read.
PSEB 10th Class Computer Notes Chapter 5 Desktop Publishing Notes 2

Gutter Position

A gutter margin setting adds extra space to the side margin or top margin of a document that we plan to bind. A gutter margin helps ensure that text isn’t hidden by the binding.

PSEB 10th Class Computer Notes Chapter 5 Desktop Publishing

Fonts:

A font is a set of printable or displayable text character s in a specific style and size or we can say that a font is a specific typeface of a certain size and style. A typeface is a set of characters of the same design. These characters include letters, numbers, punctuation marks, and symbols. Some popular typefaces include Arial, Helvetica, Times, and Verdana. While most computers come with a few dozen typefaces installed, there are thousands of typefaces available.
PSEB 10th Class Computer Notes Chapter 5 Desktop Publishing Notes 3

Printer:

A printer is an external output device that takes data from a computer and generates output on a paper in the form of graphics/text. There are two types of printers.

Impact Printers

An impact printer has a head that contains pins to make, contact with the paper. It usually forms the print image by striking its pins on a inked ribbon against the paper. Following are some examples of impact printers:

1. Dot-Matrix Printers. The dot-matrix printer uses print heads containing from 9 to 24 pins.
These pins produce patterns of dots on the paper to form the individual characters. The 24 pin dot-matrix printer produces more dots that a 9 pin dot-matrix printer, which results in much better quality and clearer characters.
PSEB 10th Class Computer Notes Chapter 5 Desktop Publishing Notes 4
The general rule is, the more pins, the clearer the letters on the paper. The pins strike the ribbon individually as the print mechanism moves across the entire print line in both directions, i.e, from left to right, then right to left, and so on. The user can produce a color output with a dot-matrix printer (the user will change the black ribbon with a ribbon that has color stripes). Dot-matrix printers are inexpensive and typically print at speeds of 100-600 characters per second.

2. Daisy-Wheel Printers. It is called daisy-wheel printer because the print mechanism looks like a daisy; at the end of each “Petal” is a fully formed character which produces solid-line print. A hammer strikes a “petal” con-taining a character against the ribbon, and the character prints on the paper. Its speed is slow typically 25-55 characters per second.
PSEB 10th Class Computer Notes Chapter 5 Desktop Publishing Notes 5

3. Line Printers. Line printers, or line-at-a-time printers, use special mecha¬nism. that can print a whole line at once; it can typically print the range of 1,200 to 6,000 lines per minute. Drum, chain, and band printers are line-at- a-time printers.

PSEB 10th Class Computer Notes Chapter 5 Desktop Publishing

Non-Impact Printers:

Non-impact printers do not use a striking device to produce characters on the paper; and because these printers do not hammer against the paper its much quieter. Following are some non-impacted printers:

1. Ink-Jet Printers

Ink-jet printers work in the same fashion as dot-matrix printers in the form images or characters with little dots. However, the dots are formed by tiny droplets of ink.
PSEB 10th Class Computer Notes Chapter 5 Desktop Publishing Notes 6
Ink-jet printers form characters on paper by spraying ink from tiny nozzles through an electrical field that arranges the charged ink particles into characters at the rate of approximately 250 characters per second. The ink is absorbed into the paper and dries instantly. Various colors of ink can also be used.

2. Laser Printers

A laser printer works like a photocopy machine. Laser print¬ers produce images on paper by directing a laser beam at a mirror which again directs the beam onto a drum. The drum has a special coating on it to which toner (an ink powder) sticks. Using patterns of small dots, a laser beam conveys information from the computer to a positively charged drum to become neutralized. From all those areas of drum which become neutralized, the toner detaches. As the paper rolls by the drum, the toner is transferred to the paper printing the letters or other graphics on the paper. A hot roller bonds the toner to the paper.
PSEB 10th Class Computer Notes Chapter 5 Desktop Publishing Notes 7
Laser printers use buffers entire page at a time. When a whole page is loaded, it will be printed. The speed of laser printers is high and it print quietly without producing much noise. Many home-use laser printers can print eight pages per minute, but faster and print approximately 21,000 lines per minute, or 437 pages per minute (if each page contains 48 lines). When high speed laser printers were introduced they were expensive.

PSEB 10th Class Computer Notes Chapter 8 Microsoft Publishers-II

This PSEB 10th Class Computer Notes Chapter 8 Microsoft Publishers-II will help you in revision during exams.

PSEB 10th Class Computer Notes Chapter 8 Microsoft Publishers-II

Advertisements:

Microsoft Publisher is a desktop publishing program that is part of the Microsoft Office suite. With Microsoft Publisher, you can create many professional-quality custom publications such as brochures, greeting cards, and signs. The publisher also allows you to create items that are larger than standard printer paper sizes, such as banners, by making them on multiple sheets of paper you can print and assemble.

PSEB 10th Class Computer Notes Chapter 8 Microsoft Publishers-II

Brochure:

A brochure is an informative paper document often used for advertising that can be folded into a template, pamphlet, or leaflet. Brochures are promotional documents, primarily used to introduce a company, organization, products, or services to the public. Brochures are distributed inside newspapers, handed out personally, or placed in brochure racks in high-traffic locations. They may be considered grey literature.

Now day’s brochures are also available in electronic format and are called e-brochures. They have the added benefit of having unlimited distribution and cost savings when compared to traditional paper brochures.

The most common types of single-sheet brochures are the bi-fold (a single sheet printed on both sides and folded into halves) and the tri-fold (the same, but folded into thirds). A bi-fold brochure results in four panels (two panels on each side), while a tri- fold results in six panels (three panels on each side).

Booklet brochures are made of multiple sheets most often saddle stitched stapled on the creased edge, or perfect bound like a paperback book, and result in eight or more panels.

How to Create a Banner in Microsoft Publisher:

Microsoft Publisher is a tool that enables users at home to create professional looking publications, banners, and flyers. Real estate professionals use Publisher to create banners and flyers for homes they are trying to sell. Banners can be made for special occasion parties, or advertising and marketing products. Save time and money by creating your own wonderful banner.
PSEB 10th Class Computer Notes Chapter 8 Microsoft Publishers-II Notes 1
Following are steps that are used to create a banner in Microsoft Publisher:
1. In the Publication Types list, click Banners.
2. In the Banners gallery, do one of the following:

  • Click the banner design that you want – for example, Apartment for Rent.
  • Click View templates from Microsoft Office Online, click the banner design that you want to download, and then go to step 4.

3. Under Customize and Options, select any options .that you want.
4. Click Create.
5. In the Format Publication task pane, do any of the following:

  • To change the width and height of the banner, click Change Page Size in the task pane, and then choose the page size, or click Create custom page size.
  • To change the banner’s color scheme, click Color Schemes in the task pane, and then choose the scheme that you want.
  • To change the banner’s font scheme, click Font Schemes in the task pane, and then choose the scheme that you want.

6. In your banner, replace the placeholder text and pictures with the text and pictures or other objects that you want.
7. On the File menu, click Save As.
8. In the Save in box, click the folder where you want to save the new banner publication.
9. In the File name box, type a name for your banner publication.
10. In the Save as type box, click Publisher Files.
11. Click Save.

PSEB 10th Class Computer Notes Chapter 8 Microsoft Publishers-II

How to Create a Newsletter in Microsoft Publisher:

Newsletters are a great way to share information with family, friends and customers. Microsoft Publisher’s newsletter function provides complete design and layout flexibility. Use the program to select a design layout and color scheme, format text and insert images quickly and easily to create a custom newsletter.
PSEB 10th Class Computer Notes Chapter 8 Microsoft Publishers-II Notes 2
Following are steps that are used to create a newsletter in Microsoft Publisher:
1. Choose a newsletter design. On the main menu click “File” and then “New” to open the Catalog Window. Click the “Newsletters” option on the Wizards menu, select the desired design from the options and then click “Start Wizard.” Enter your contact information in the window prompt. Delete the sample text in the field to leave a field blank. Click “Include color scheme in this set” and select the desired colors. Click “Update” when finished. Complete the steps in the Wizard or click “Finish” to exit the Newsletter wizard.

2. Enter the text. Place the mouse inside the desired text box and click once. Type the text or cut and paste from a Word document. Format the font style, size and appearance by using the main menu at the top of the screen. Place the mouse over the border until the word “Resize” appears. Click and drag the border to the desired size.

3. Insert images by clicking “Insert” and then “Picture.” Select from clip art or photos stored on your computer. Resize the image. Click and drag the mouse diagonally towards the center of the photo until the photo reaches the desired size.

4. Edit the text box-and image layouts as needed. Create a new text box by , clicking the text frame tool (“A”). Place the mouse in the desired location, then click and drag to create the desired box size. Place the mouse over the item until the word “Move” appears. Click and hold down the mouse and drag to the desired location. Place the mouse inside the box and click once, on the main menu click “Edit” and then “Delete Object” if you need to delete a text box.

5. Change the number of pages in the newsletter as needed. Click “Insert” and then “Page” and follow the instructions in the pop up window. Click the desired page number at the page display on the bottom of the screen and click “Edit” and then “Delete Page” to remove pages.

6. Finalize the newsletter. Proofread and spell check. Print the document on paper and place the pages in order to ensure the page numbers line up properly before copying. This is helpful if you plan to copy two-sided or convert to 11 × 17 inch paper.

PSEB 10th Class Computer Notes Chapter 8 Microsoft Publishers-II

How to create a Poster in Microsoft Publisher:

To create a poster in Publisher, create a banner, and then change the page size to the poster size that you want. Given ahead are steps that are used to create a poster in Microsoft Publisher:
PSEB 10th Class Computer Notes Chapter 8 Microsoft Publishers-II Notes 3
1. In the Publication Types task pane, click Banners, do one of the following:

  • Under Banners, click Blank Sizes.
  • Click View templates from Microsoft Office Online, click the poster design that you want to download, and then go to step 3.

2. Under Blank Sizes, click the paper size thafyou want, or click Create custom.
3. Page size and create a custom page size.
4. Click Create.
5. In the Format Publication task pane, do any of the following:

  • To change the color scheme, click Color Schemes in the task pane, and then choose the scheme that you want.
  • To change the font scheme, click Font Schemes in the task pane, and then choose the scheme that you want.

6. On the File menu, click Save As.
7. In the Save in box, click the folder where you want to save the new publication.
8. In the File name box, type a name for your publication.
9. In the Save as type box, click Publisher Files.
10. Click Save.

How to Make a Decorative Envelope Using Microsoft Publisher:

Special occasion cards get piled away with the rest of the mail when they are in plain envelopes with no special decal or design to separate them from others. Design a special envelope using Microsoft Publisher for a single use birthday card envelope or to use on all your mailings, so that people will see your envelopes and know that they are from you. Relatives and close friends will also appreciate the time you took to make their envelope special.
PSEB 10th Class Computer Notes Chapter 8 Microsoft Publishers-II Notes 4
Following are steps that are used to create an envelope in Microsoft Publisher:

1. Launch Microsoft Publisher and click “Publications for Print.” A list of options will appear underneath this section. You can choose from several pre-made envelopes. These envelope designs are for several different types of businesses.

2. Delete any option or area of the envelope you do not need for your purpose. Select the area by left-clicking on the area once and it will bring up a border around the box. Right-click on the selection and choose “Delete.”

3. Move any of the pre-selected fields by dragging it to where you would prefer it. Select the area; move the mouse pointer till it becomes a four arrowed figure. Left click and hold the mouse button and drag the box to where you want it.

4. Fill in the address fields by highlighting and entering in the correct information.

5. Insert pictures and designs to the envelope to make it more personal. Click “Insert” and “Clipart”, “Object” or “Textbox.” Recipients of your letters will love having designs on the envelopes that display your personality.

6. Choose to make your own envelope from scratch by selecting “Blank Print Publication” from under the New section on the left-hand side of the Microsoft Publisher screen. Select “File”, “Page Setup” and a new window will appear. Hit “Envelope” from under the Publication Type and adjust any height and width dimensions you may need. This is easy, just measure your envelope.

7. Insert and edit till your message is clear from the design on your envelope. Try printing in grayscale and on regular paper before printing on any envelopes. This will save money and trees.

PSEB 10th Class Computer Notes Chapter 8 Microsoft Publishers-II

Greeting Card/ Invitation Card/ Compliment Card:

A greeting card/ Invitation card/ compliment card is a piece of card or high quality paper expressing friendship or any other sentiment. Although these cards are usually given on special occasions such as Birthdays, Anniversary, Christmas, Diwali or other holidays, they are also sent to convey thanks or express other feelings. These cards are usually packaged with an envelope, come in a variety of styles. There are both mass-produced as well as handmade versions that are distributed by hundreds of companies. These can also be designed with the help of MS Publisher.

Award Certificates:

  1. An award is something given to a person, a group of people, or an organization in recognition of their excellence in a certain field. An award may be accompanied by trophy, title, certificate, medal, badge, pin, or ribbon.
  2. Certification refers to the confirmation of certain characteristics of an object, person, or organization. This confirmation is often, but not always, provided by some form of external review, education, assessment, or audit.
  3. Certificates of achievement, merit, and honor can be powerful tools when used at the right time and presented in the right way.
  4. Receiving an award certificate gives a person the warm glow of knowing someone took the time to acknowledge them. And being the person who motivates others can be rewarding, too.
  5. Award certificates may include: Community Service Award, Great Job, Good Behavior or Course Completion. MS Publisher provides many templates for creating Award Certificates.

Envelops:

An envelope is a common packaging item, usually made of thin flat material. It is a flat paper container with a sealable flap designed to enclose a flat object, such as a letter, card or document. Traditional envelopes are made from sheets of paper. They are most commonly used for enclosing and sending mail (letters) through a prepaid-postage postal system. We can create envelop with MS publisher. After selecting the required envelop design, edit the color scheme and click on Create button. Now we can edit the envelop information and save it as a publication.

Labels:

A label is a piece of paper, polymer, cloth, metal, or other material affixed to a container or product. Information printed directly on a container or item can also be considered labeling. Labels have many uses, including providing information on a product’s origin, manufacturer (e.g., brand name), use, shelf- life and disposal etc. Many hazardous products such as poisons or flammable liquids must have a warning label.

Labels can be used for:

  1. Products. Permanent product labels need to remain secure throughout the life of the product. For example, a food label must.be secure until the food has been used.
  2. Packaging. Packaging may have labeling attached to or integral with the package. These may carry pricing, barcodes, UPC (Universal Product Code) identification, usage guidance, addresses, advertising, recipes, and so on.
  3. Assets: In industrial or military environments, asset labeling is used to clearly identify assets for maintenance and operational purposes. Such labels are frequently made of engraved Trifoliate or a similar material.
  4. Textiles. Garments normally cany separate care/treatment labels which typically indicate how the item should be washed for e.g. machine washed or diy cleaned. Textile labels may be woven into the garment or attached, and may be heat resistant, colorfast, washable. Printed labels are an alternative to woven labels.
  5. Mailing. Mailing labels identify the addressee, the sender and any other information which may be useful in transit.
  6. Security Labels. They are used for authentication, theft reduction, and protection against counterfeit and are commonly used on ID cards, credit cards, packaging, and products from CDs to electronics to clothing.
  7. Labels may be used for any combination of identification, information, and warning, instructions for use, environmental advice or advertising. They may be stickers, permanent or temporary labels or printed packaging.

PSEB 10th Class Computer Notes Chapter 8 Microsoft Publishers-II

Letterhead:

It is stationery with a printed heading. The heading usually consists of a name and an address, a logo or corporate design, and sometimes a background pattern. The term “letterhead” is often used to refer to the whole sheet imprinted with such a heading. Many companies and individuals prefer to create a letterhead template in a word processor or other software application. This generally includes the same information as pre-printed stationery, but at lower cost. Letterhead can then be printed on stationery or plain paper as needed or sent electronically.

Calendar:

A calendar is a system of organizing days for social, religious, commercial or administrative purposes. This is done by giving names to periods of time, typically days, weeks, months and years. Calendars are also used to help people manage their personal schedules, time and activities.

Calendars are also used as part of a complete timekeeping system: date and time of day together to specify a moment in time.

Resumes:

A resume provides a summary of our education, work history, credentials, and other accomplishments and skills. There are also optional sections, including a resume objective and career summary statement. Resumes are the most common document requested of applicants in job applications. A resume should be as concise as possible. Typically, a resume is one page long, although sometimes it can be as long as two pages. Often resumes include bulleted lists to keep information concise.

Curriculum vitae(CV)

Like resume, a curriculum vitaE (CV) provides a summary of one’s experience and skills. Typically, CVs are longer than resumes – at least two or three pages. CVs include information on one’s academic background, including teaching experience, degrees, research, awards, publications, presentations, and other achievements. CVs are thus much longer than resumes, and include more information, particularly related to academic background. We can create CVs with the help of MS Publisher in same way we have created Resumes above.

PSEB 10th Class Computer Notes Chapter 8 Microsoft Publishers-II

Menus:

In a restaurant, there is a menu of food and beverage offerings. A menu may be a list from which guests use to choose options available. Basically Menu is the main way to give or take order from guest. Guest may order properly to see the menu and be aware about our food and price. MS Publisher provides many templates for creating a Menu.

Signs:

A sign is a piece of paper, clothe, wood or any other material which is painted with pictures or words and which gives some information about a particular place, product, or event. We can create any of these sign using publisher.

Paper Folding Projects:

The paper folding templates include patterns for paper airplanes and origami projects alike. They include pages (that may require trimming) with “fold- lines” and others with instructions to create our paper masterpieces. We can enjoy these Paper Folding Projects in our leisure time and can make some creative things.

Microsoft Publisher offers templates for kids. These templates.consist of different paper folding projects like airplanes, boats, cups, and more.

PSEB 10th Class Computer Notes Chapter 7 Microsoft Publishers-I

This PSEB 10th Class Computer Notes Chapter 7 Microsoft Publishers-I will help you in revision during exams.

PSEB 10th Class Computer Notes Chapter 7 Microsoft Publishers-I

Microsoft Publisher is a desktop publishing application from Microsoft. It is an entry-level application, differing from Microsoft Word in that the emphasis is placed on page layout and design rather than text composition and proofing. The current version is Microsoft Publisher 2010 for Windows, there is no version for other operating systems like Linux and Unix.

PSEB 10th Class Computer Notes Chapter 7 Microsoft Publishers-I

Microsoft Publisher:

Microsoft Publisher is differing from Microsoft Word in that the emphasis is placed on page layout and design rather than text composition and proofing.

Microsoft Publisher is a business desktop publishing program that enables users to easily create professional-looking marketing materials. The Microsoft Publisher offers more design options with over 2,000 professionally designed publication templates and hundreds of design elements for users to mix and match within their publications.

A flexible wizard model allows users to work the way they want, and automated design expertise helps them achieve professional results without design expertise. Stronger office integration and a complete print-to-web publishing solution enable users to deliver professional-looking results.

Differences between Word and Publisher:

The differences in Word and Publisher are as follows:

Word Publisher
1. Word is an example of Word Processing Software 1. Publisher is an example of DTP software
2. Word Document has extension .doc 2. Publisher document has extension of .pub
3. Word is mostly used of common typing purpose 3. Publisher is used for designing professional objects.

How to Start Publisher:

Microsoft Publisher is a great tool to create posters for personal or professional events.
PSEB 10th Class Computer Notes Chapter 7 Microsoft Publishers-I Notes 1PSEB 10th Class Computer Notes Chapter 7 Microsoft Publishers-I

Creating a Publication:

We can create new publication by following methods:

  1. By using blank layout.
  2. By using installed templates.
  3. By using online templates.

Creating a publication using blank layout:

Following are the steps to start with a blank publication:

  1. Click the File menu, and then click New.
  2. Under Available Templates, click a blank publication template, and then click Create.
  3. Now, we can create a publication with our own specifications in publication. We can also add the objects to the blank layout like text, picture, word art, and auto shapes etc.
  4. After creating publication, save the publication by clicking on save option in File menu. The Save As dialog box appears, type a name for bur publication, select the folder in which you want to save it, and then click save button. The publication is saved with a .pub extension.
  5. Close the publication by clicking close button in File menu. A dialog box appears, if we want to save the changes, then click yes button, otherwise click no.
  6. Before exiting Publisher, we should close all the publications, then Click Exit in File menu or click cross button on title bar.

Components of publisher window:

There are three most important components that we should remember as we work within Publisher 2010. These are:
PSEB 10th Class Computer Notes Chapter 7 Microsoft Publishers-I Notes 2

PSEB 10th Class Computer Notes Chapter 7 Microsoft Publishers-I

Components of Publisher Window:

1. Quick Access Toolbar:

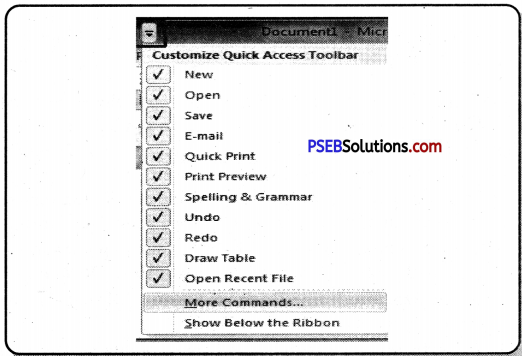
The quick access toolbar is a customizable toolbar that contains commands that we may want to use. We can place the quick access toolbar above or below the ribbon. To change the location of the quick access toolbar, click on the arrow at the end of the toolbar and click Show below the Ribbon. We can also add items to the quick access toolbar, simply click on any item and if will be added to our toolbar.

2. Ribbon:

The ribbon is the panel at the top portion of the document it has six tabs: Home, Insert, Page Design, Mailings, R9eview, and View. Each tab is divided into groups

3. File Window:

When we click on the File menu, we are brought to the Info screen. It looks like that our document is gone, but it is not. As we click on the options in the File menu, the screen will change accordingly.

  1. Save: Save the file as a 2010 file.
  2. Save As: Allows you to choose a different file type (i.e. PDF, Word).
  3. Open: Browse to a Publisher file.
  4. Close: Closes the file but keeps Publisher running.
  5. Info: Edit Business information, use Design Checker, and set Commercial Print Information.
  6. Recent: List of our recently used Publisher files.
  7. New: New Publication Screen.
  8. Print: Print Options.
  9. Save & Send: Options for saving e mailing the file.
  10. Help. Microsoft Help.
  11. Options. Set default options.
  12. Exit. Closes Publisher (file and program).

Working in Publication:

1. Adding Text:

  1. From the Home or Insert Tab, select Draw Text Box.
  2. Place the cursor on the page where we want to draw a text box. _
  3. Click and drag the cursor across the page to the desired size. The size of the text box can be changed after we have drawn it.
  4. When we let go of the left click on the mouse, we are brought to the format tab which gives us more options for the text box.
  5. Type the text in text box.

2. Editing Text:

1. Highlight the text you want to edit.
2. If you are not brought to the Text Box Tools Format Tab, then select it.
3. Text Group Options.
(a) Text Fit! Defines how the text will fit in the text box: Best Fit, Shrink Text on Overflow, Grow Text Box to Fit, Do Not Auto-Fit.
(b) Text Direction. Changes direction to horizontal or vertical.
(c) Hyphenation. Changes hyphenation behavior of selected text.
4. Font Group Options. Style, Font Size, Bold, Italics, Underline, Text Spacing, & Color.
5. Alignment Group Options. Text Box Alignment, Columns, Margins.
6. Effects Group Options. Shadow, Outline, Engrave, Emboss.

3. Change Style of Text Box:

  1. Click on Text box.
  2. Click on Drawing tools on Format tab.
  3. Use shape style group options to change style, shape fill, shape outline, or shape change options.
  4. Use arrange group options to change Wrap Text, Bring Forward or Backward, Rotate.

4. Inserting Clip Art:

To insert the clip art follow these steps:

  1. Click on the Insert Tab.
  2. Click Clip Art. The Clip Art window appears on the right side of the screen.
  3. Type in a keyword.
  4. Click Go.
  5. Browse through the results.
  6. When we find clipart, click on the thumbnail from the Clip Art Window.
  7. The Clip Art image will then appear on our page.

PSEB 10th Class Computer Notes Chapter 7 Microsoft Publishers-I

5. Inserting a Picture:

To insert a picture follow these steps:

  1. Click on the Home or Insert tab.
  2. Click on Picture.
  3. Browse to the location of the picture we have saved on our computer.
  4. Select the picture and click Insert.

6. Insert a Shape:

To insert a shape follow the steps:

  1. Click on the Home or Insert tab.
  2. Click on Shapes.
  3. Select a shapeirom the drop down menu.
  4. On the page, click and drag to create the shape.
  5. The shape appears on the page, and we are brought to the Drawing Tools.
  6. Format tab. From this tab, we can edit the style, fill, outline, and more.

7. Text Wrapping:

Text wrapping is the way our object is set on the page in reference to the text. To do text wrapping following are the steps:

  1. Select the object.
  2. Click on the Format tab (Text Box, Drawing or Picture Format).
  3. In the arrange group, click on Wrap Text. This will determine how text will be arranged around the object.

8. Resizing Objects:

Resizing enables us to resize our objects :
1. Click on the object.
2. Click and drag the handles to resize.
(a) The corner handles will resize the object proportionally.
(b) The handles centered on the lines of the box will stretch the object vertically and horizontally.
The green handle allows us to rotate the object.

9. Moving Objects:

  1. Click on the object.
  2. Place our cursor over the solid line so that we see the crosshairs.
  3. Click and drag the object to the desired location.

10. Deleting Objects:

We can also delete any object, if do not require it in our publication.
1. Click on the object.
2. Press Delete button on the keyboard.

PSEB 10th Class Computer Notes Chapter 7 Microsoft Publishers-I

Frame:

Most publications are divided into several different areas called frames. A frame can contain a variety of objects such as graphics, tables, or text boxes. Frames can be resized, moved and manipulated to suit your needs.

Working with Frames:

Each publication is composed of different frames, such as text frames, picture frames, table frames, and shape/object frames. Click on different areas of the publication to identify the different frames. Handles, little circles on the corners and sides of the frame will appear. The handles help us to show which frame we have selected. These are also used in resizing frames.

Handles:

When we click on a frame, small circles appear around the edge of the frame. These are called handles. We can click and drag on the handles to resize our frame. To move a Picture Frame:
1. Click on the picture.
2. When our cursor turns into a four directional arrow, click and drag the picture frame to the desired location.

To move a Text Frame:
1. Click on the text frame.
2. Rest our cursor near the border of the text frame. When our cursor turns into a four directional arrow, click and drag the text frame to the desired location.

Resizing Frames:

To resize a picture frame:

1. Click on the picture.
2. Rest our cursor on a corner handle. When our cursor turns into a diagonal line with arrows on the ends, click and drag inwards at a diagonal to make it smaller or outwards at a diagonal to make it larger. Using comer handles to resize pictures allows us to keep the picture’s proportions.

To resize a Text Frame:

1. Click on the text frame.
2. Rest your cursor on one of the handles. When your cursor turns into a line with arrows on the ends, click and drag inwards or outwards to resize the text area.

Deleting Frames:

Right-click on the frame that we would like to delete. Select Delete Object from the list of choices. .

Inserting Additional Text Frames

1. Click on Text box from the Insert Tab.
2. Click and drag over an area of the publication.
3. Type the text ypu want to appear.

Viewing Pages in Our Publication:

There are three ways to view pages in a publication:
1. Click on the thumbnails of the pages in the publication from the Page Navigation Window on the left hand side of the screen.
2. From the View tab, we can switch from, single page to two-page spread view as well as choose other viewing options.

Template:

A Template is a tool used in Publisher to help us easily create basic publications. The template has a set of prechosen design styles that we can use as it is or customize as we see fit.

Each template is customizable. Click on a template from the center. On the right side of the screen, we can change the template colors, fonts, and more. Once we have found a template and customized it, click Create. After we click create, we can edit the text boxes, images, and shapes that have been set up by the template as needed.

PSEB 10th Class Computer Notes Chapter 7 Microsoft Publishers-I

Customizing a Template

1. Changing the Design of a Template
To change the design template follow the following steps:
1. Click on the Page Design tab.
2. To change the entire template, click Change Template.

  • Choose a template from the pop-up window. If we are currently working in a template and changing to a different template, the information we have entered will conform to the new template.

3. To change the color scheme, browse through the color schemes available in the Schemes group.

  • However the mouse over the color scheme to preview.
  • To select a color scheme, click on it.

4. To change the font scheme, click on Fonts in the Schemes group.

  • Browse through the available font schemes.
  • However the mouse over the font scheme to preview.
  • To select a font scheme, click on it.
  • If we want to create our own font scheme, click.

Page Design:

1. Click the tab Page Design if needed, to change templates, adjust page margins, apply ruler guides, or apply built-in color schemes to the chosen template.
2. We can use the Built-in Ruler Guide templates to help in aligning text boxes, pictures, or other objects. To apply a Built-in Ruler Guide template click on the command Guides in the group Layout, and then choose a template.
3. To add a vertical or horizontal ruler guide repeat the above step, then click on Add Vertical or Horizontal Ruler Guide.
4. To add additional guides, move the mouse pointer oyer the vertical or horizontal ruler, drag the guide in the desired direction when the pointer changes to a two headed arrow.

Creating a publication with Templates:

We can create a publication in Publisher by using template.
Available Publication Types: Publisher 2010 allows us:
1. To apply built-in templates.
2. To apply our own custom templates.
3. To search from a variety of templates available on Office.com. Office.com provides a wide selection of popular Publisher templates, including newsletters and flyers.

To find and apply a template in Publisher 2010, dp the following:
1. On the File tab, click New.
2. Under Available Templates, do one of the following:

  • To use a template that we already have installed, click My Templates, click the template that we want, and then click Create.
  • To use one of the pre-built templates installed in Publisher, under Most Popular or More Templates, click the category that we want, click the template that we want, and then click Create.
  • To find and apply a template on Office.com, under Most Popular or More Templates, click the category that we want, click the template that we want, and then click Download.

PSEB 10th Class Computer Notes Chapter 7 Microsoft Publishers-I

Creating Publication with Installed Templates:

We can create any publication easily with the help of the installed templates available in Publisher. We can use pre designed templates in publisher and create so many publications like Brochures, Business Cards, Calendars, Greeting Cards, Labels, Newsletters, Postcards, Advertisements, Award Certificates, Banners, Business Forms, Catalogs, E-mail, Envelops, Flyers, Gift certificates, Invitation cards, Letterhead, menus, resumes and so many quick publications.

Creating Publication with Online Templates:

We can create any publication easily with the help of the internet because we have also a option to create publication using online templates. For online templates, internet facility is available in our system. To find and apply a template on online Templates, click the category that we want, click the template that we want, and then click Download, and then apply that template.

Saving Your Publication:

There are two basic ways to save our publication. First one is to Point and click on the save icon on our toolbar.
Or
Follow these steps:

  1. Click on the File menu and Save As.
  2. When the Save As Dialogue Box appears Click Browse and find the location on computer where we want the file saved.
  3. Type the name of our publication in the File Name field.
  4. Click on the Save button.

PSEB 10th Class Computer Notes Chapter 7 Microsoft Publishers-I

Printing Your Publication:

There are two basic ways to print your publication.
First one is to click on the print icon on toolbar. This will print one copy of our publication with the default print options.
Or

  1. Click on the File menu and click Print.
  2. When the print window appears, select the desired number of copies.
  3. Choose any other Print Settings- All Pages, Selection, Current Page or Custom Range Manually enter page numbers we want to print How many pages print per sheet of paper Paper Size 1-sided or 2-sided printing Click Print.

PSEB 10th Class Computer Notes Chapter 2 HTML Fundamentals

This PSEB 10th Class Computer Notes Chapter 2 HTML Fundamentals will help you in revision during exams.

PSEB 10th Class Computer Notes Chapter 2 HTML Fundamentals

HTML stands for Hypertext Markup Language, and it is the most widely used language to write Web Pages.

  • Hypertext refers to the way in which Web pages (HTML documents) are linked together. Thus, the link available on a webpage is called Hypertext.
  • As its name suggests, HTML is a Markup Language which means you use HTML to simply “mark-up” a text document with tags that tell a Web browser how to structure it to display.

PSEB 10th Class Computer Notes Chapter 2 HTML Fundamentals

HTML:

Originally, HTML was developed with the intent of defining the structure of documents like headings, paragraphs, lists, and so forth to facilitate the sharing of scientific information between researchers.

Web page has many elements as page style, paragraph, list, table and picture etc. Each section is written in the form of tag. The tags indicate that the element viz. heading, list, paragraph etc to which the section of web page relates. Picture, sound and movie can be included in addition to the text in a web page.

Structure of Document:

It is easier to understand the structure of a HTML document. The complete document is written between <HTML> and </HTML> tags. The tags <Head>, <Body>, <Title>etc are written between these. The structure of HTML document is explained in detail below:
PSEB 10th Class Computer Notes Chapter 2 HTML Fundamentals Notes 1

Creating A Web Page or Html Document:

Web page is the first page of a website. This gives an introduction about whole website. This page contains many types of the links which are related with other web pages.
The whole of work regarding creation of web document is done in notepad. The steps to be followed to open a notepad are:
1. Start → Programs → Accessories → Notepad
Or
2. Notepad can also be opened by typing notepad in Run dialog box.
The notepad windows will be displayed. Create the document in the notepad as under :
<HTML>
<HEAD>
<TITLE> First Web Page</TITLE>
</HEAD>
<BODY>
This is my first Web page in HTML document.
</BODY>
</HTML>

PSEB 10th Class Computer Notes Chapter 2 HTML Fundamentals

Viewing HTML Document

Save this document as .html extension. For example, you can name this document as MyWebpage.html.
To look at web page we use some web browser. Internet explorer is a commonly used browser. The steps to look a webpage with the help of internet explorer are as under:

  1. Click on Start → Programs → Internet Explorer Internet explorer windows will be displayed.
  2. Click on File → Open Menu
  3. Go to MyWebpage.html file with the help of browse button and click on open button.
  4. Click OK. The internet explorer will show the Page.

Types of Web Browsers:

Web Browsers are software installed on your PC. To access the Web, you need a web browser, such as Netscape Navigator, Microsoft Internet Explorer or Mozilla Firefox.
There are four leading web browsers – Explorer, Firefox, Netscape, and Safari, but there are many other browsers available. You might be interested in knowing complete browser statistics. Now we will see these browsers in a bit more detail.

1. Internet Explorer. Internet Explorer (IE) is a product from software giant Microsoft. This is the most commonly used browser in the universe. This was introduced in 1995 along with Windows 95 launch and it has passed Netscape popularity in 1998.

2. Google Chrome. This web browser is developed by Google and its beta version was first released on September 2, 2008 for Microsoft Windows. Today, chrome is known to be one of the most popular web browser with its global share of more than 50%.

3. Mozilla Firefox. Firefox is a new browser derived from Mozilla. It was released in 2004 and has grown to be the second most popular browser on the Internet.

4. Safari. Safari is a web browser developed by Apple Inc. and included in Mac OS X. It was first released as a public beta in January 2003. Safari has very good support for latest teclinologies like XHTML, CSS2 etc.

5. Opera. Opera is smaller and faster than most other browsers, yet it is full- featured. Fast, user-friendly, with keyboard interface, multiple windows, zoom functions, and more. Java and non Java-enabled versions available. Ideal for newcomers to the Internet, school children, handicap and as a front-end for CD- Rom and kiosks.

PSEB 10th Class Computer Notes Chapter 2 HTML Fundamentals

HTML Tags:

HTML is made up of different tags and attributes. The tag is an HTML command that shows the layout or displays the desired output of a whole or part of the web page. HTML tag is bound by angular brackets ( <> ) that always opens with a < (less than) sign and closes with a > (greater than) sign. It controls the appearance, layout and flow of the web page.
A tag contains three parts: element (identification of tag), attribute and value.
HTML tags can be of two types:
1. Container/Paired Tags
2. Empty/Singular Tags

1. Container/Paired Tags. It is also called container tag. A tag is said to be a paired tag if it along with a companion tag or closing tag appears at the end. For example, the tag is paired tag. The tag with its closing tag is used to render in Bold Text. In paired tag, first tag is called the opening tag and the second tag is called the closing tag.

2. Empty/Singular Tags. The second type of tag is the singular tag, which is also known as a stand-alone tag or empty tag. The stand-alone tag does not have companion tag or closing tag.
For example: Other singular tags are:
Tags Description
<BR> Insert a link break
<HR> Defines a horizontal rule
<!–> Defines a comment

HTML Attributes:

An attribute defines a property for an element, consists of an attribute/value pair, and appears within the element’s start tag. An element’s start tag may contain any number of space separated attribute/value pairs.
An attribute is used to define the characteristics of an HTML element and is placed inside the element’s opening tag. All attributes are made up of two parts – a name and a value:
1. The name is the property you want to set. For example, the paragraph <p> element in the example carries an attribute whose name is align, which you can use to indicate the alignment of paragraph on the page.
2. The valuers what you want the value of the property to be set and always put within quotations.

Tags Attributes

PSEB 10th Class Computer Notes Chapter 2 HTML Fundamentals

Body Tags:

It is main tag of HTML. It contains all other tags. Everything written in this tag is displayed.

Background Attributes:

It defines background image of HTML document <Body Background = “Image.JPG”>

Bg Color attribute:

It defines background color of HTML document <Body bgcolor = ” green” >

Difference between Background and BGCOLOR:

The difference between background and BGCOLOR is as ahead:

Background BGCOLOR
1. Background attribute is used in body as well as in table tag ,to add background image in the given webpage or a table. 1. BGCOLOR attribute is used in body as well as in table tag, to change the background color of the webpage or a table.
2 Syntax <body background= “Red”> 2. Syntax is <table bgcolor=”Green” >
3. Example : <BQDY background-‘image.jpg”> 3. Example : <body bgcolor-‘green”>

Text Attribute:

It defines Text Color in HTML document <Body Text = “Read”>

Formatting In Html Documents:

HTML Headings

The heading tag is used to fix the heading. There are 6 levels of heading in all. The levels are numbered as heading 1 to heading 6. All the letters of the heading in a given level have same font. The font size goes on decreasing as we move from heading 1 to heading 6. The heading in level 1 is expressed by tags <H1> and </Hl>. Similarly in the heading in level 2 we use the tags <H2> and </H2>. <H6> is the lowest level. The font size in it is the smallest.

Tags – Description
<H1 >…</HI> – A first-level heading.
<H2>…</H2> – A second-level heading.
<H3>…</H3> – A third-level heading.
<H4>…</H4> – A fourth-level heading (seldom used).
<H5>…</H5> – A fifth-level heading (seldom used).
<H6>…</H6> – A sixth-level heading (seldom used).

Font Tag

Fonts play a very important role in making a website more, user friendly and increasing content readability. Font face and color depends entirely on the computer and browser that is being used to view your page but you can use HTML <font> tag to add style, size, and color to the text on your website. You can use a <basefont> tag to set all of your text to the same size, face, and color.

The font tag is having three attributes called size, color, and face to customize your fonts. To change any of the font attributes at any time within your webpage, simply use the <font> tag. The text that follows will remain changed until you close with the </font> tag. You can change one or all of the font attributes within one <font> tag.

PSEB 10th Class Computer Notes Chapter 2 HTML Fundamentals

Set Font Size

You can set content font size using size attribute. The range of accepted values is from 1 (smallest) to 7(largest). The default size of a font is 3.

Setting Font Face

You can set font face using face attribute but be aware that if the user viewing the page doesn’t have the font installed, they will not be able to see it. Instead user will see the default font face applicable to the user’s computer.

Specify Alternate Font Faces

A visitor will only be able to see your font if they have that font installed on their computer. So, it is possible to specify two or more font face alternatives by listing the font face names, separated by a comma.
<font face = “drial,helvetica”>
When your page is loaded, their browser will display the first font face available. If none of the given fonts are installed, then it will display the default font face, Times New Roman.

Setting Font Color

You can set any font color you like using color attribute. You can specify the color that you want by either the color name or hexadecimal code for that color.

Paragraph Tag:

Paragraph is the basic composition of HTML, Paragraph is started with <P> tag and closes with </P> tag. Whenever one has to get to next line leaving one line blank, <P> tag is used. The tag <P> leave a space equivalent to one line between previous line and the following line.

Paragraph Tag Attributes

The paragraph tag has a few basic attributes you should learn about to start with.

  • id – this has to be unique to the page. An id can be used on multiple pages but only once on a single page.
    An id can be used in the stylesheet to set specific formatting to the paragraphs with this id.
  • class – A class is used to apply styling to the paragraph. It can be applied to many paragraphs on the page or across the whole website.
  • lang – defines the language used in the paragraph. You would use this if the contents of the paragraph is different from the base language of the web page. e.g. French when the rest of the page is in English.
  • style – The style attribute is used when you want to apply specific styling to a paragraph.

Novice web page coders and some HTML editors do this when using the design view of the HTML editor like a word processing program. This adds unnecessary coding to the web page as this is a typical styling it can be applied using the stylesheet.

Using the style attribute of the paragraph tag makes it hard to manage the editing of the website because in the future if you want to change the styling you have to hunt down every instance of that inline style in all the pages. This can be quite a bit of work if you have a large site. We would recommend that you try and avoid using this paragraph tag attribute all together but if you absolutely have to use it, use it very few times.

PSEB 10th Class Computer Notes Chapter 2 HTML Fundamentals

The Line Break:

The line break tag is used to start the text from the new line. This tag does not leave a blank line space as the paragraph tag does. The text jumps to new line on using line break tag. The tag <BR> is a symbol for line break.

Difference between <P> and <BR> tags.

The difference between <P> and <BR> tag is as follows:

Paragraph <P> Tag Break <BR>Tag
1. <P> tag is a container element which marks a block of text as a paragraph in a webpage and tlxl web browser leaves a line between two paragraphs. This tag has an attribute ALIGN, which can take three values – left, right and center. 1. The <P> tag denotes a paragraph and ends with a </P> and is a container tag. t < BR> tag b an empty element that is used to break a line and display the proceeding text from the next line, without giving any spare between two lines. It has no attribute. The <BR> is a line break and is an empty tag.
2. This tag is used to define paragraphs with in your text. 2. This tag is simply a line break. It just jumps to the next line without any spacing or formatting options.
3. Example: <P>hello Dear students </P> 3. Example : Hello<BR>Dear Students.

The HR Tag

The HR (Horizontal Ruler) tag is a very helpful html element for dividing up sections of text in a page, without having to resort to one pixel high graphic. The problem is that left unstyled, your leaving it up to the browser to determine how it looks. Which can be indifferent at the best of times.

One way to control this is by using the available HTML attributes:

  • align: [left, center and right] noshade: (solid line)
  • size: [pixel value] line height of the element
  • width: [ pixel or percentage value ] width of the element

HTML Lists:

HTML offers web authors three ways for specifying lists of information. All lists must contain one or more list elements. Lists may contain:

  • <ul> – An unordered list. This will list items using plain bullets.
  • <ol> – An ordered list. This will use different schemes of numbers to list your items.
  • <dl> – A definition list. This arranges your items in the same way as they are arranged in a dictionary.

PSEB 10th Class Computer Notes Chapter 2 HTML Fundamentals

HTML Ordered Lists

If you are required to put your items in a numbered list instead of bulleted, then HTML ordered list will be used. This list is created by using <ol> tag. The numbering starts at one and is incremented by one for each successive ordered list element tagged with <li>.

Example
PSEB 10th Class Computer Notes Chapter 2 HTML Fundamentals Notes 3

The type Attribute

You can use type attribute for <ol> tag to specify the type of numbering you like. By default, it is a number. Following are the possible options:

  • <ol type = “1”> – Default-Case Numerals.
  • <ol type = “I”> – Upper-Case Numerals.
  • <ol type = “i”> – Lower-Case Numerals.
  • <ol type = “A”> – Upper-Case Letters.
  • <ol type = “a”> – Lower-Case Letters.

The start Attribute

You can use start attribute for <ol> tag to specify the starting point of numbering you need. Following are the possible options:

  • <ol type = “1” start = “4”> – Numerals starts with 4.
  • <ol type = “I” start = “4”> – Numerals starts with IV.
  • <ol type = “i” start = “4”> – Numerals starts with iv.
  • <ol type = “a” start = “4”> – Numerals starts with d.
  • <ol type = “A” start = “4”> – Numerals starts with D.

HTML Unordered List:

An unordered list is a collection of related items that have no special order or sequence. This list is created by using HTML <ul> tag. Each item in the list is marked with a bullet.
Example
PSEB 10th Class Computer Notes Chapter 2 HTML Fundamentals Notes 4

The type Attribute:

You can use type attribute for <ul> tag to specify the type of bullet you like. By default, it is a disc. Following are the possible options:

  • <ul type = “square”>
  • <ul type = “disc”>
  • <ul type = “circle”>

PSEB 10th Class Computer Notes Chapter 2 HTML Fundamentals

HTML Definition Lists:

HTML and XHTML supports a list style which is called definition lists where entries are listed like in a dictionary or encyclopedia. The definition list is the ideal way to present a glossary, list of terms, or other name/value list.
Definition List makes use of following three tags:

  • <dl> – Defines the start of the list
  • <dt> – A term –
  • <dd> – Term definition
  • </ dl> – Defines the end of the list

Example
PSEB 10th Class Computer Notes Chapter 2 HTML Fundamentals Notes 5

Difference between Ordered and Unordered Lists:

The difference between ordered and unordered lists is as follows :

Ordered List Unordered list –
1. In an Ordered list, the order of the list item is important. If we change the order, the meaning of the whole list changes.

2. Ordered List starts with <OL> and ends with</OL> tag.

3. Ordered List has an <U> (list Item) tag which defines the list dements defined in the list.

4. In an Ordered List, the attribute used is TYPE which has values as 1, A, a, I, i.

5. Default value of TYPE ATTRIBUTE is 1.

1. In an unordered list the order of the items is not significant. We can swap two items or reverse the whole list and it still remains the same list.

2. Unordered List starts with <UL> and aids with</UL> tag.

3. Unordered List has an <U> (List Item) tag which defines the list dements defined in the list.

4. In an Unordered List the attribute used is TYPE which has values as *, o, and SQUARE. ‘

5. Default value of TYPF. ATTRIBUTE is “Disc”.

PSEB 10th Class Computer Notes Chapter 2 HTML Fundamentals

Nested List:

When a list is given in another list. It is called a nested list. We can give as many as list in another lists.

HTML – Images:

Images are very important to beautify as well as to depict many complex concepts in simple way on your web page. This tutorial will take you through simple steps to use images in your web pages.

Insert Image

You can insert any image in your web page by using <img> tag. Following is the simple syntax to use this tag.
<imgsrc = “Image URL” … attributes-list/>
The <img> tag is an empty tag, which means that, it can contain only list of attributes and it has no closing tag.

Example
To try following example, let’s keep our HTML file test.htm and image file test.png in the same directory.
PSEB 10th Class Computer Notes Chapter 2 HTML Fundamentals Notes 6

Set Image Location

Usually we keep all the images in a separate directory. So let’s keep HTML file test.htm in our home directory and create a subdirectory images inside the home directory where we will keep our image test.png.

Set Image Width/Height

You can set image width and height based on your requirement using width and height attributes. You can specify width and height of the image in terms of either pixels or percentage of its actual size.

PSEB 10th Class Computer Notes Chapter 2 HTML Fundamentals

Set Image Border

By default, image will have a border around it, you can specify border thickness in terms of pixels using border attribute. A thickness of 0 means, no border around the picture.

Example
PSEB 10th Class Computer Notes Chapter 2 HTML Fundamentals Notes 7

Set Image Alignment

By default, image will align at the left side of the page, but you can use align attribute to set it in the center or right.

Example
PSEB 10th Class Computer Notes Chapter 2 HTML Fundamentals Notes 8

HTML-Tables:

The HTML tables allow web authors to arrange data like text, images, links, other tables, etc. into rows and columns of cells.
The HTML tables- are created using the <table> tag in which the <tr> tag is used to create table rows and <td> tag is used to create data cells. The elements under <td> are regular and left aligned by default.
Example
PSEB 10th Class Computer Notes Chapter 2 HTML Fundamentals Notes 9

PSEB 10th Class Computer Notes Chapter 2 HTML Fundamentals

Table Heading

Table heading can be defined using <th> tag. This tag will be put to replace <td> tag, which is used to represent actual data cell. Normally you will put your fop row as table heading as shown below, otherwise you can use <th> element in any row. Headings, which are defined in <th> tag are centered and bold by default.

Cellpadding and Cellspacing Attributes

There are two attributes called cellpadding and cellspacing which you will use to adjust the white space in your table cells. The cellspacing attribute defines space between table cells, while cellpadding represents the distance between cell borders and the content within a cell.

Colspan and Rowspan Attributes

You will use colspan attribute if you want to merge two or more columns into a single column. Similar way you will use rowspan if you want to merge two or more rows.

Difference between Colspan and Rowspan Attributes

The difference between colspan and rowspan is as follows:

Colspan Rowspan
1. Sometimes it makes sense for a cell to span multiple columns. This might be used for a header cell that titles a group of columns of entries.

2. Allows a single table cell to span the width of more than one cell or column.

3. ROWSPAN is attribute that is used in i.e. <th> and <td> tag.

4. It provides the same functionality as “merge cell” in spreadsheet programs like Excel.

5. Example: <th colspan=”3″>

1. Sometimes it makes sense for a cell to span multiple rows. This might be used for a side-bar that groups rows of entries.

2. Allows “a single table cell to span the height of more than one row.

3. COLSPAN is attribute that is used in i.e. <th> and <td> tag.

4. It provides the same functionality as “merge cell” in spreadsheet programs like Excel.

5. Example: <th rowspan=”3″>

Tables Backgrounds

You can set table background using one of the following two ways –
1.  bgcolor attribute – You can set background color for whole table or just for one cell.
2. background attribute – You can set background image for whole table or just for one cell.
You can also set border color also using bordercolor attribute.

PSEB 10th Class Computer Notes Chapter 2 HTML Fundamentals

Table Height and Width

You can set a table width and height using width and height attributes. You can specify table width or height in terms of pixels or in terms of percentage of available screen area.

Table Caption

The caption tag will serve as a title or explanation for the table and it shows up at the top of the table. This tag is deprecated in newer version of HTML/ XHTML.

Table Header, Body and Footer:

Tables can be divided into three portions – a header, a body, and a foot. The head and foot are rather similar to headers and footers in a word-processed document that remain the same for every page, while the body is the main content holder of the table.
The three elements for separating the head, body, and foot of a table are –

  • <thead> – to create a separate table header.
  • <tbody> – to indicate the main body of the table.
  • <tfoot> – to create a separate table footer.

A table may contain several <tbody> elements to indicate different pages or groups of data. But it is notable that <thead> and <tfoot> tags should appear before <tbody>.

PSEB 10th Class Computer Notes Chapter 1 Office Tools

This PSEB 10th Class Computer Notes Chapter 1 Office Tools will help you in revision during exams.

PSEB 10th Class Computer Notes Chapter 1 Office Tools

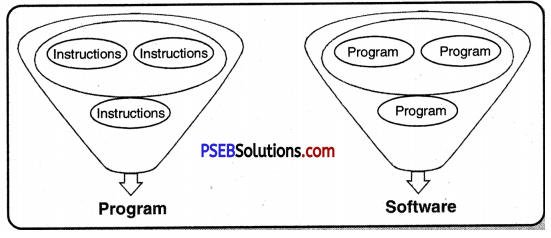
Programs run in a computer. A program is a group of step by step instructions. Group of these programs is called software. There are two types of software. First is application and second system software. Application software are used for specific tasks and system software is used to control the computer.

PSEB 10th Class Computer Notes Chapter 1 Office Tools

Software:

Computer can not do any work itself. It needs instructions to work. These instructions are written in computer readable languages. Group of these instructions is called a program. Group of programs is called software.

Types of Software:

Productivity of a computer is determined by the programs running in it. The assemblage of such programs is called software. Software can be divided into two categories as under:
1. System Software
2. Application Software
PSEB 10th Class Computer Notes Chapter 1 Office Tools Notes 1

System Software

All the functions of a computer are controlled by system software. If the system software is not installed in a computer, then Application Software can not function. This establishes transmission of information in a computer.

It controls and runs the application programs. The following figure depicts the relationship among Hardware, Software and User. The system software are further divided into many types e.g. operating system, language translator, utility program etc.

Application Software

The combination of application programs is called application software. The application software is used for special function. To run these softwares, your computer must have system software installed on it. But every computer has system software (like operating system) pre-installed in it.

The application software is only used as per requirement. Different users have different requirements. So every user uses different software according to one’s need.

PSEB 10th Class Computer Notes Chapter 1 Office Tools

Office Tools

Office tools are software programs designed to make computer users more productive and efficient at our workplace. Office productivity tool is a category of application programs that help users produce things such as documents, databases, graphs, worksheets and presentations.

Office Productivity Tools

It is that category of software which allows the user to create documents, spreadsheets, databases etc. Examples of office productivity tools contains word processors DBMS, graphic software and spreadsheet.

Types of Office Tools:

1. Word Processing Software. It is the main software used in schools, homes, industrial and commercial establishments. Its main importance is that one can change, edit and print the text written in this software. MS-Word, Notepad, Pagemaker etc. are some word processing softwares. Once you learn how to use these softwares then it becomes easier to use other softwares.

2. Database Software. This software helps us to store the large quantity data and making alterations in them. They store data in a tabular form and can provide useful information as and when required. For example, we can store the record of names of students, the marks obtained by them and other related information in a database software. It is easy to include new data, delete or print it with the help of database software. MS Excel, Fox Pro, Oracle etc are database software.

3. Spreadsheet Software. Spreadsheet software stores the numeric data. Calculations can be done in it. In can be used for making time-table, keeping the income-expenditure account, storing the marks obtained by students and compiling their results. It consists of columns & rows. MS-Excel, LOTUS etc are spread sheet softwares.

4. Prersentation Software. This software can be used for editing pictures. The artists use this software for making computer images and drawings. One can make graphs, maps, charts etc with its usage. MS PowerPoint, Paint, Adobe Photoshop etc. are some examples of Graphic Software.

Multimedia Software

Multimedia software are those which are used for editing multimedia objects like films, audio files etc. It includes audio converter, player, burners, video encoder and decoders etc.

PSEB 10th Class Computer Notes Chapter 1 Office Tools

Objectives of using MS-word:

MS -Word is used for creating, editing and formatting a document, inserting tables, pictures and editing them. We have also used the feature of mail merge, spell- check and thesaurus etc.
Microsoft Word can be used for the following purposes:

  1. To create business documents having various graphics including pictures, charts and diagrams.
  2. To store and reuse readymade content and formatted elements such as cover pages and sidebars.
  3. To create letters and letterheads for personal and business purpose.
  4. To design different documents such as resumes or invitation cards etc.
  5. To create a range of correspondence from a simple office memo to legal copies and reference documents.

Formatting in MS-Word

Planning a document design is vital to ensure the printed output of our document accomplishes our goal or not. Document design determine if the document orientation will be portrait (vertical) or landscape (horizontal), if the document will be formatted in single or multiple columns. A landscape document with two columns is the most readable and popular layout for an event program. It also determines if we will use any images or clip art.

Templates in MS-Word

Word 2010 allows us to apply built-in templates from a wide selection of popular Word templates, including resumes, agendas, business cards, and faxes.
To apply a template in Word, do the following:
1. On the File tab, click New.
PSEB 10th Class Computer Notes Chapter 1 Office Tools Notes 2
2. Under Available Templates, select the following:

  • To use one of the built-in templates, dick Sample Templates, click the template that you want, and then click Create.
  • To reuse a template that you’ve recently used, click Recent Templates, click the template that you’ve want, and then click Create.
  • To find a template on Office.com, under Office.com Templates, click the template category that you want, click the template that you want, and click download to download the template from Office.com to my computer.

3. Once you have selected the template you can modify it in any way to create the document you want.
Microsoft Word 2010 allows us to create and edit personal and business documents, such as letters, reports, invoices, emails and books. By default, documents saved in Word 2010 are saved with the .docx extension.

PSEB 10th Class Computer Notes Chapter 1 Office Tools

Creating a resume with MS – Word Templates

Follow the steps written below:

  1. Click on New in File tab.
  2. In Office.com templates, select Resumes and Cover Letters.
  3. MS – Word will download the selected template from office.com templates.
  4. Here various styles are available for resumes and cover letters. Select any one according to the requirement and click download.
  5. Resume with selected template will appear.
  6. Now you can edit it and can make the necessary changes in resume.
  7. After filling all the required information in the resume, save it.

Ms-Excel:

Excel is a spreadsheet program used to create and format workbooks. It helps us in analyzing data and making data more informative in order to take business decisions. Specifically, we can use Excel to track data, analyze data, write formulae to perform calculations on that data, pivot the data in numerous ways, and present data in a variety of professional-looking charts.

Excel allows us to create a new workbook using a template, which is a predesigned spreadsheet. Several templates are preloaded in Excel, while others can be located on Office.com. A spreadsheet template is a predesigned spreadsheet which can be used, to create new spreadsheets with the same formatting and predefined formulae. With templates, we don’t need to know how to do the math, or even how to write formulae – these are already integrated into the spreadsheet.

Creating Workbook using Template

1. Click the File tab and Select New. The Available Templates pane appears.
PSEB 10th Class Computer Notes Chapter 1 Office Tools Notes 3
2. In Available templates, click Sample templates to choose a built-in template, or select an Office.com template category.
3. Now click on Finish & Merge option and select Edit Individual Documents from the menu.
4. A dialog box Merge to New Document will open. Choose option All and click Ok to show the report card of all the students in excel worksheet.
5. Now a new Word document will open having report cards of all the students. You can save this document and can also take printouts.

PSEB 10th Class Computer Notes Chapter 1 Office Tools

Sale Invoice

Sale invoice can be created in Excel using template. It is created like other templates. We can add data as per our requirement and save it.

PSEB 10th Class Computer Notes Chapter 1 Office Tools Notes 4

Using Mail Merge With Spreadsheet:

We can use Mail merge feature in Microsoft word to create student Annual Report. It seems very interesting.

Creating student Annual Report

Student Annual Report can be created using MS Word and MS Excel using following steps :

  1. Prepare the annual report format in MS word. Mention student’s detail like admission no, roll no, name, father’s name, marks of each subject, overall result and percentage of marks of student.
  2. On the other side, prepare an excel worksheet, in which student’s admission no, roll no, name, father’s name, subject-wise marks obtained in subjects Punjabi, English, Maths, Science, Social Studies and grades etc. are entered,
  3. Next calculate the percentage of marks of each student using a formula.
  4. Now, click on Mailing Tab, and start mail merge. Then, choose Letter option which we already prepared.
  5. Next Click on Select Recipients and select Use Existing List option. Choose excel sheet from Select Table dialog box and click OK.
  6. Place the cursor where you want to insert the value of field from excel sheet. Now go to Insert Merge Field option in Write & Insert Fields group. A dropdown menu will be displayed having field names.
  7. Select the field names one by one after placing the cursor in proper place in the student annual report. All fields will be displayed.
  8. After inserting all the clicking Preview Results next and previous button, you can preview the result of students by option.
  9. Now click on Finish & Merge option and select Edit Individual Documents from the menu. A dialog box Merge to New Document will open. Choose option All and click OK to show the report card of all the students in excel worksheet.
  10. Now a new Word document will open having report card of all the students. Save this document and we can also take printouts.

PSEB 10th Class Computer Notes Chapter 1 Office Tools

Page Layouts:

We see a document for printing in page layout and format if accordingly. It contains following things : –

  1. Line Space
  2. Page Margin
  3. Page Orientation
  4. Page Break
  5. Tab Stop

PSEB 10th Class Computer Notes Chapter 1 Office Tools Notes 5
1. Adjusting Line Spacing:

The default spacing is 1.15 line spacing and 10 points after each paragraph. The easiest way to change the line spacing for an entire document is to select the paragraphs or entire document that we want to change the line spacing on.
1. On the Flome tab, in the Paragraph group, click Line Spacing.
PSEB 10th Class Computer Notes Chapter 1 Office Tools Notes 6
2. Do one of the following.
Click the number of line spaces that you want.
Click Remove Space Before Paragraph to remove any additional lines added after each paragraph as a default.
PSEB 10th Class Computer Notes Chapter 1 Office Tools Notes 7

2. Page Margins:

Page margins are the blank space around the edges of the page. In general, we insert text and graphics in the printable area inside the margins. When we change a document’s page margins, we change where text and graphics appear on each page.

Setting predefined page margins:
1. On the Page Layout tab, in the Page Setup group, click Margins. The margins gallery drop down menu will appear.
PSEB 10th Class Computer Notes Chapter 1 Office Tools Notes 8
2. Click the margin type that we want to apply.
PSEB 10th Class Computer Notes Chapter 1 Office Tools Notes 9

3. Page Orientation:

We can choose either portrait (vertical) or landscape (horizontal) orientation for all or part of our document.
To change page orientation:
1. On the Page Layout tab, in the Page Setup group, click Orientation.
PSEB 10th Class Computer Notes Chapter 1 Office Tools Notes 10
2. Click Portrait or Landscape.
Different page orientations on same document:
1. Select the pages or paragraphs that you want to change to portrait or landscape orientation.
2. On the Page Layout tab, in the Page Setup group, click Margins.

  • Click Custom Margins at the bottom of the drop down menu.
  • A Page Setup dialog box will appear.
  • On the Margins tab, click Portrait or Landscape.
  • In the Apply to list, click Selected text or This point forward.

Creating custom margins:
1. On the Page Layout tab, in the Page Setup group, click Margins.
2. At the bottom of the Margins gallery drop down menu, click Custom Margins.
PSEB 10th Class Computer Notes Chapter 1 Office Tools Notes 11

3. The Page Setup dialog box will appear.
4. Enter new values for the margins in all or some of the Top, Bottom, Left or Right text boxes.
5. Click OK.

4. Page Breaks:

Word automatically inserts a page break when we reach the end of a page. If we want the page to break in a different place, we can insert a manual page break.

Inserting a page break:
1. Click where you want to start a new page.
PSEB 10th Class Computer Notes Chapter 1 Office Tools Notes 12
2. On the Insert tab, in the Pages group, click Page Break.
One another formatting option is setting Tab stops.

5. Tab Stops:

Creating tab stops can be helpful when creating a large number of documents such as flyers, table of contents or even when creating a resume. They help us to display and line up information correctly.

Setting manual tab stops:
1. Click the tab selector at the left end of the ruler S until it displays the type of tab that you want.
2. Then click in the ruler at the top of the page, where you want to set the tab stop.
PSEB 10th Class Computer Notes Chapter 1 Office Tools Notes 14
The different types of tab stops are:

  1. A Left Tab stop sets the start position of text that will then run to the right as we type.
  2. A Center Tab stop sets the position of the middle of the text. The text centers on this position as we type.
  3. A Right Tab stop sets the right end of the text. As we type, the text moves to the left.
  4. A Decimal Tab stop aligns numbers around a decimal point.
    Independent of the number of digits, the decimal point will be in the same position (we can align numbers around a decimal character only).
  5. A Bar Tab stop doesn11 position text. It inserts a vertical bar at the tab position.

PSEB 10th Class Computer Notes Chapter 1 Office Tools

Clear Tab Stops

We can clear tab stops in a variety of ways, the simplest is going to the ruler, click and hold on the tab stop and drag in down towards the document. The tab stop will disappear. To quickly clear multiple tab stops and start fresh:
1. Click the Home tab, click the Paragraph Dialog Box Launcher.
2. A Paragraph box will appear, click on the Tabs button at the bottom left of the dialog box.
PSEB 10th Class Computer Notes Chapter 1 Office Tools Notes 15
3. A Tabs dialog box will appear.
4. In the list under Tab stop position, click the tab stop position that we want to clear, and then click Clear. To remove the spacing from all manual tab stops, click Clear All.
5. Click OK.

Finalizing A Document:

After completing our work, we need to finalize our document using some features of MS-word. –

Using the “Spell Check” Feature:
As we type our document, red wavy lines will appear under any word that is spelled incorrectly. The fastest way to fix spelling errors is to:
1. Put the cursor over the misspelled word and right click.
PSEB 10th Class Computer Notes Chapter 1 Office Tools Notes 16
2. A drop down box will appear with correct spellings of the word.
3. Highlight and left click the word you want to replace the incorrect word with.
To complete a more comprehensive Spelling and Grammar check, we can use the Spelling and Grammar feature:
1. Click on the Review tab.
2. Click on the Spelling & Grammar command.
PSEB 10th Class Computer Notes Chapter 1 Office Tools Notes 17
3. A Spelling and Grammar box will appear.
4. We can correct any Spelling or Grammar issue within the box.

PSEB 10th Class Computer Notes Chapter 1 Office Tools

Print Preview:

Print Preview automatically displays when we click on the Print tab. When we make a change to a print-related setting, the preview is automatically updated. To print preview your document follow these steps:
1. Click the File tab, and then click Print. To go back to your document, click the File tab.
PSEB 10th Class Computer Notes Chapter 1 Office Tools Notes 18
2. A preview of your document automatically appears. To view each page, click the arrows below the preview.

Print Command:

The Print tab is the place to go to make sure that we are printing what we want.
1. Click the File tab.
2. Click the Print command to print a document.
3. Click the Print button to print your document.
4. This dropdown shows the currently selected printer. Clicking the dropdown will display other available printers.
PSEB 10th Class Computer Notes Chapter 1 Office Tools Notes 19
5. These dropdown menu show currently selected Settings. Rather than just showing us the name of a feature, these dropdown menu show us what the status of a feature is and describes it.

Ms – Powerpoint:

Microsoft PowerPoint is a presentation tool that supports text, shapes, graphics, pictures and multimedia along with integration with other Microsoft Office tools like Excel. By default, documents saved in PowerPoint 2010 are saved with the .pptx extension whereas the file extension of the prior PowerPoint versions is .ppt. PowerPoint enables us to present information in office meetings, lectures and seminars to create maximum impact in a minimal amount of time.

PSEB 10th Class Computer Notes Chapter 1 Office Tools

Background in MS – PowerPoint

We all know that PowerPoint is a design-based program. Backgrounds in Power point are effective ways of improving the readability of the slides. The themes in PowerPoint help us to select the backgrounds by default, so every time we change the theme, the default background is set automatically. Theme includes more than just backgrounds.
A theme is a set of colors, fonts, effects and more that can be applied to our entire presentation to give it a consistent, professional look. We can apply any theme by clicking it in the Design ribbon.
Here are the steps to apply backgrounds in PowerPoint:
1. In the Design ribbon, under the Background group, click the Background Styles command.
PSEB 10th Class Computer Notes Chapter 1 Office Tools Notes 20
2. Select one of the background styles that suit your requirements.
3. To edit the background for a specific slide, right-click on the desired background slide and select “Apply to Selected Slides”.
4. Selected slide(s) now have the new background.

Transitions in MS – PowerPoint

PowerPoint supports slide transition feature which allows us to specify how the slides should transition during the slide show.
A powerPoint presentation that had special effects between each slide, are slide transitions. A transition can be as simple as fading to the next slide or as complex as a flashy effect. This means we can choose transitions to fit the style of any presentation. There are three categories of unique transitions to choose from, all of which can be found on the Transitions tab:

  • Subtle (slight transitions)
  • Exciting (Strong Transition)
  • Dynamic Content (strong transitions that affect only the content, such as text or images)

PSEB 10th Class Computer Notes Chapter 1 Office Tools Notes 21
PSEB 10th Class Computer Notes Chapter 1 Office Tools Notes 22
3. To specify the timing of the effects, on the Animations tab, use the commands in the Timing group.

Saving Presentation:

Save option allows us to save a new file or an existing file in standard format (.pptx format). If we are working on a previously saved file this will save the new changes in the same file format. If we are working on a new file, this command would be similar to the Save As command.

Saving Presentation as pdf File

As we know PowerPoint is used to create presentations, it supports various file types when it comes to saving the content. Using a pdf file type can be a great way of saving the slides.
Steps to save a presentation as a pdf file are :’
1. Go to the backstage view under the File tab.
PSEB 10th Class Computer Notes Chapter 1 Office Tools Notes 23
Home Insert Design Transitions Animations Slide Show Review
2. Click on Save -As to open the Save As dialog.
3. Add a proper name to the file.
PSEB 10th Class Computer Notes Chapter 1 Office Tools Notes 24
4. Select the file type as .pdf from the list of supported file types and click save.
5. The .pdf file is created in the specified location.

PSEB 10th Class Computer Notes Chapter 1 Office Tools

Saving Presentation as Video File

PowerPoint allows presentations to be saved as files that can be posted on video sharing platform like YouTube or just played on any other-media.
Steps to save a presentation as a video file are:
1. Go to the backstage view under the File tab.
2. Click on Save As to open the Save As dialog.
3. Add a proper name to the file.
PSEB 10th Class Computer Notes Chapter 1 Office Tools Notes 25
4. Select the file type as .wmv from the list of supported file types and click Save.
5. The video creation is not an instant process like other file types as PowerPoint needs to create the video file. We can track the progress of video creation at the bottom of our presentation window.
6. Once the creation is complete, the video file is created in the specified location.

PSEB 10th Class Computer Notes Chapter 1 Office Tools

Image File:

Among the many file types that PowerPoint supports, Image File is also supported by it. There are a set of extensions for image files. The image file extensions supported by PowerPoint include JPEG (.jpg), GIF (.gif), TIFF (.tiff) and Bitmap (.bmp).

Printing Presentation:

It is sometimes necessary that we share our slides with our audience in printed format before we begin presenting them so they can take notes.

Broadcast Slideshow:

PowerPoint 2010 offers users to broadcast their presentations on the internet to worldwide audience. Microsoft offers the free broadcast Slide Show service, all we need to do is share the link with our audience and they can watch the presentation from anywhere. There is no special setup or charges required to do this, all we need is a Windows Five account.

PSEB 10th Class Computer Notes Chapter 1 Office Tools

Packaging Presentation:

Certain presentations are better suited for distribution as a CD to audience. In such cases, we can .create a CD packaging which can be burned into a CD and distributed.

PSEB 10th Class Computer Notes Chapter 4 Web Development

This PSEB 10th Class Computer Notes Chapter 4 Web Development will help you in revision during exams.

PSEB 10th Class Computer Notes Chapter 4 Web Development

The main purpose of a website is to deliver specific information to a target audience. The success of the website is measured in terms of the number of visitors to the site and the ease with which the visitors find the required information.

The target audience of the website also plays an important role. It may be purely for entertainment, educational, health, tour and travels; accordingly appropriate; content has to gather and interface has to design. Before design the interface, it is essential to layout the information structure of the site.

PSEB 10th Class Computer Notes Chapter 4 Web Development

Planning Site:

Before designing a website, it is necessary to do proper planning as in the case of buildfng a house. If you startibuilding your house without giving a thought of planning, the house may end up into an uncomfortable dwelling. Same way, for building a good website certain things should be taken care of.
The following things should be considered while planning a website:

  • Purpose of website
  • Target audience
  • Website contents
  • Blue print of a website
  • Directory structure of the website
  • Budgeting

Purpose of Website

The initial stage of planning your website is to “Identity the Purpose of the Site”. It could be as follows:

  • To educate people
  • To entertain people
  • To promote / sell a product
  • To promote information on companies, products and sources, sports and games, travel and tourism, medicines and health.
  • Having specific purpose is a necessary since it provides you with the guidelines on what should be put onto your site; what resources (Software, Hardware, and Manpower) are needs for the project etc.

Designing for the Audience

The next step is to “Identify the Target Audience”, their knowledge , background, interests and needs, age, gender, geographic location etc. Determining, who the visitors are likely to be crucial in deciding not only the general appearance (look and feel) of the site, but also the technology that might be used to build the site.

If the website is likely to have visitors who access from home, it is necessary to designate the papers with the understanding that users will have probably slow modem connections. On the other hand, if visitors are expected to be fans of music, rock band, then high-end technology such as Macromedia Flash, Animation with sound effects may be acceptable.

PSEB 10th Class Computer Notes Chapter 4 Web Development

Strategy:

When the designer has decided to build a particular site, we will have to think about its work-strategy. The mode of works to carry out for achieving the goal is called work-strategy. Many kinds of information can be included in the website :
(a) Text information
(b) Audio or Voice information
(c) Video information.

Website Contents:

Once the Purpose and Target Audience of the website are defined properly, organize the website contents. Put together any existing documents and pictures you want to work. For example, if it is a company website, you may want to assemble logos, company information, and product descriptions. While doing website content information, the following steps to consider:

Who will write or provide the text (contents). Some very basic contents might be:

  • Who you are
  • What you do
  • How to contact you
  • List of services and products
  • Assemble photographs, logos
  • Updating of text and other content to keep site fresh and content correct

Web Implementation Guidelines:

Choosing Domain Name:

Domain Name is the web address of a website. It is placed in database of server.

Domain Name Registration:

A domain name is a way to identify and locate computers connected to the Internet. When using the internet, you use a domain name when you type a web address, or URL. A web address would look something like given below:

Domain names are registered for a variety of reasons. Some build a website right away, or buy a name to build a site later, while others purchase domain names in order to protect a company name or trademark, and some register a domain name so they can have personalized e-mail addresses. You get a domain name from a domain name registrar. Accredited Domain Registrars in India are:

PSEB 10th Class Computer Notes Chapter 4 Web Development

Choosing Web Server:

One of the keys to a successful online business is the web server. In order for a customer to see the products – or to see the page at all, for that matter – the server has to take the request for the web page and upload it from the disk where the file is. Therefore, if you don’t have the right server, nobody is ever going to see your page.

Organizing Web Page:

Organizing the website into specific sections and then providing links to those sections at the top of each page is an effective and simple way to make the website easy to navigate. The Webpage should be beautifully organized. So that it gives a balanced look. The size of the page is an important-point in organizing webpage.

Look:

Webpage should have a fine look so that one is attracted to read it. In a webpage with a good look designer should insert links graphics, animation, sound and video clips. The various contents in the webpage should give an impression of diversity and a beautiful view. Usage of proper font size/colour, background colour, table, graph etc. gives a good look to the site.

Validate the Code:

Validate the HTML, CSS, XHTML, JavaScript, and XML codes to ensure that the website has clean code and function as intended for visitors. There are several programs available online that validate each type of code.

Offline Testing:

After designing all the webpages it is tested on the browser. No internet con¬nection is required for this test that is why it is named as offline test. In offline test first of all home page is opened in different browser. Then we check all the linked pages one by one. Designer should ascertain it here that all pages have a good appearance.

The website should be thoroughly tested to confirm that the design and page structure are displayed as intended. Specifically, view the website with the most popular browsers, including Chrome, Firefox, Internet Explorer, Opera, and Safari, as those browsers are used by the majority of people who are browsing the Internet.

PSEB 10th Class Computer Notes Chapter 4 Web Development

Uploading the Site:

To make the site available to all the viewers on the internet is called Upload. To transfer. The webpages to the “Host” we need File Transfer Protocol (FTP) client. For this purpose first of all we set FTP programmer as Cute FTP. Then upload the file after coming online. The copy of the website on computer is called the local versibn, and the copy on the web host is called the production version.

Online Testing:

When the site is uploaded online, next step is to test it online. Make the internet connection, open the browser, and type URL of the site. Check that all the links of the site are working property.

SEO:

Utilize both Meta and ALT tags to ensure that the website not only appears in user searches but that pertinent keywords from the content of the website are dis¬played. Doing so will more likely attract searchers1’interests and will facilitate more visits to the website. ALT tags are merely a written description to go along with the pictures on the website, and so they are necessary’ to tell search engines and searchers what kind of pictures are there on the website.

Installing Website Analytics:

The statistics will enable to monitor the number of visits website receives, the amount of time visitors stay, the average number of page views for each visitor, and many other useful statistics. Making use of such software will enable to make adjustments to the website to increase its effectiveness.

Important Aspects of Website Publishing:

SEO

SEO means search engine optimization. Search engine optimization is a meth-odology of strategies, techniques and tactics used to increase the amount of visi¬tors to a website by obtaining a high-ranking placement in the search results page of a search engine including Google, Bing, Yahoo and other search engines.

SEO helps to ensure that a site is accessible to a search engine and improves the chances that the site will be found by the search engine. SEO is typically a set of practices that webmasters and Web content producers follow to help them achieve a better ranking in search engine results.

PSEB 10th Class Computer Notes Chapter 4 Web Development

Social Media Marketing (SMM)

SMM is a form of Internet marketing that utilizes social networking websites as a marketing tool. The goal of SMM is to produce content that users will share with their social network to help a company increase brand exposure and broaden customer reach.

One of the key components of SMM is social media optimization (SMO). Like search engine optimization (SEO), SMO is a strategy for drawing new and unique visitors to a website. SMO can be done in two ways: adding social media links to content, sharing buttons – or promoting activity through social media by updating statuses or tweets, or blog posts.

SMM helps a company get direct feedback from customers (and potential customers) while making the company seem more personable. SMM became more common with the increased popularity of websites such as Twitter,Facebook, My space, Linkedln, afid YouTube.

Important Instructions for Publishing of a Web Site:

Page Content

1. Spelling and grammar, paragraphs, headers, lists, and other formatting should be correct.
2. Company contact details are accurate throughout the website.
3. Images and audio and videos are in the correct places, formatted and working on all devices.

Page Design

Take the necessary steps to ensure that the site design is pixel perfect. If de¬signer has a responsive website. It needs to check the design across all devices. The site should be looking good not just on an office desktop, but also on laptops, tablets, and mobile phones.

Functionality

Take some time to test and validate all of the different features on the website. Lead generation forms, social sharing, should work flawlessly across the website such as:
1. Thank-you message or page displays after form is submitted.
2. Company logo is linked to the homepage.
3. Load time for site pages is optimized.

PSEB 10th Class Computer Notes Chapter 4 Web Development

SEO

Take some time to ensure that the website has been given a solid foundation for , SEO success. From site architecture and content to metadata sitemaps, do not leave any stone unturned such as:
1. Pages have unique page titles (fewer than 70 characters, includes keywords).
2. Pages have keywords (fewer than 10, all words appear in page copy).
3. Spelling and grammar are correct in all information.
4. Alt tags have been added to every image.

Security & Backups

Designer can prevent loss of data and protect against malware and other damages by properly setting up site security and regular backups.
1. 24 × 7 monitoring scripts are installed.
2. A copy of the final website has been made for backup purposes.
3. Ongoing copies of the website are being created and stored on a regular basis.
4. Passwords and other website credentials are stored in a secure database.

PSEB 10th Class Computer Notes Chapter 4 Web Development

Guideline regarding Compliance:

Finally, make sure the website complies with any applicable laws and regulations. Internet law can be hard, and each industry has its own set of rules to follow. Following are a few rules one needs to know about:
1. Web pages offer accessibility for users with disabilities.
2. Terms and privacy policies are visible to website visitors.

PSEB 10th Class Computer Notes Chapter 3 HTML II

This PSEB 10th Class Computer Notes Chapter 3 HTML II will help you in revision during exams.

PSEB 10th Class Computer Notes Chapter 3 HTML II

A hyperlink is a reference to Webpage that the reader can directly follow either by clicking, tapping or hovering. A hyperlink points to a whole document or to a specific element within a document. The text that is linked is called anchor text. A software system that is used for viewing and creating hypertext is a hypertext system, and to create a hyperlink is to hyperlink. A user following hyperlinks is said to navigate or browse the hypertext.

A webpage can contain various links that take you directly to other pages and even specific parts of a-given page. These links are known as hyperlinks. Hyperlinks allow visitors to navigate between Web sites by clicking on words, phrases, and images. Thus you can create hyperlinks using text or images available on a webpage.

PSEB 10th Class Computer Notes Chapter 3 HTML II

Linking Documents (Anchor Tag)

A link is specified using HTML tag <a>. This tag is called anchor tag and anything between the opening <a> tag and the closing </a> tag becomes part of the link and a user can click that part to reach to the lirfked document. Following is the simple syntax to use <a> tag:
<a href = “Document URL” … attributes-list>Link Text</a>

Form:

Apart from common attributes, following is a list of the most frequently used form attributes:

Attribute Description
1. action Backend script ready to process your passed data
2. method Method to be used to upload data. The most frequently used are GET and POST methods.
3. target Specify the target window or frame where the result of the script will be displayed. It takes values like Jblank, _self, _parent etc.
4. enctype The method attribute of the form element tells the web browser how to send form data to a server. Specifying a value of GET means the browser will add the form contents to the end of the URL. This offers a number of advantages for simple forms. It allows the browser to cache the results of the form submission, and it also allows the user to bookmark the page once the form has been submitted. As such, GET is generally used for simple forms where security is not a concern.

GET Method:

GET results in the entire contents of the submission being visible in the URL. If your form contains sensitive data, you should specify a value of POST for the method attribute. Since GET appends the form data to the current URL, it can only be used where the contents of the submission (including the complete URL) will result in a string that is 2048 characters long, or less. This is the maximum length of a URL. GET can only be used to send ASCII data.
<form method=”POST”>

The method attribute of the form element tells the web browser how to send form data to a server. Specifying a value of POST means the browser will send the data to the web server to be processed. This is necessary when adding data to a database, or when submitting sensitive information, such,as passwords.

PSEB 10th Class Computer Notes Chapter 3 HTML II

POST Method:

When data is sent using POST, submitting the form twice will result in a duplicated entry. This can be a problem if the form is linked to a membership, purchase, or other one-time action. This is why users cannot bookmark the results of a form submission if the method is POST.

Preparing a Form

Every form starts with <form> tag. It can be placed anywhere in html document. It ends with </form> tag.

Text Input

This control is used for items that require only one line of user input, such as search boxes or names. They are created using HTML <input> tag.

Example
Here is a basic example of a single-line text input used to take first name and last name –
PSEB 10th Class Computer Notes Chapter 3 HTML II Notes 1

Attributes:

Following is the list of attributes for <input> tag for creating text field:

Attribute Description
1. type Indicates the type of input control and for text input control it will be set to text.
2. name Used to give a name to the control which is sent to the server to be recognized and get the value.
3. value This can be used to provide an initial value inside the control.
4. size Allows to specify the width of the text-input control in terms of characters.
5. maxlength Allows to specify the maximum number of characters a user can enter into the text box

Text Area:

This is used when the user is required to give details that may be longer than a single sentence. Multi-line input controls are created using HTML <textarea> tag.

Example
Here is a basic example of a multi-line text input used to take item description:
PSEB 10th Class Computer Notes Chapter 3 HTML II Notes 2

PSEB 10th Class Computer Notes Chapter 3 HTML II

Attributes:

Following is the list of attributes for <textarea> tag:

Attribute Description
1. name Used to give a name to the control which is sent to the server to be recognized and get the value.
2. rows Indicates the number of rows of text area box.
3. cols Indicates the number of columns of text area box

Checkbox Control:

Checkboxes are used when more than one option is required to be selected. They are also created using HTML <input> tag but type attribute is set to checkbox.

Example
Here is an example HTML code for a

Attributes:

Following is the list of attributes for <checkbox> tag:

Attribute Description
type Indicates the type of input control and for checkbox input control it will be set to checkbox.
name Used to give a name to the control which is sent to the server to be recognized and get the value.
value The value that will be used if the checkbox is selected.
checked Set to checked if you want to select it by default.

Radio Button

Radio buttons are used when out of many options, just one option is required to be selected. They are also created using HTML <input> tag but type attribute is set to radio.
Example
Here is example HTML code for a form with two radio buttons:
PSEB 10th Class Computer Notes Chapter 3 HTML II Notes 3

Attributes:

Following is the list of attributes for radio button:

Attribute Description      ‘
1. type Indicates the fype of input control and for checkbox input control it will be set to radio.
2. name Used to give a name to the control which,is sent to the server to be recognized and get the value.
3. value The value that will be used if the radio box is selected.
4. checked Set to checked if you want to select it by default.

Select Box Control:

A select box, also called drop down box which provides option to list dovm various options looin the form of drop down list, from where a user can select one or more options.
Example
Here is example HTML code for a form with one drop down box
PSEB 10th Class Computer Notes Chapter 3 HTML II Notes 4

PSEB 10th Class Computer Notes Chapter 3 HTML II

Attributes:

Following is the list of important attributes of <select> tag:

Attribute Description
1. name Used to give a name to the control which is sent to the server to be recognized and get the value.
2. size This can be used to present a scrolling list box.
3. multiple If set to “multiple” then allows a user to select multiple items from the menu.

Following is the list of important attributes of <option> tag:

Attribute Description
1. value The value that will be used if an option in the select box box is selected.
2. selected Specifies that this option should be the initially selected value when the page loads.
3. label An alternative way of labeling options

Button:

There are various ways in HTML to create clickable buttons. You can also create a clickable button using <input>tag by setting its type attribute to button. The type attribute can take the following values:

Type Description
1. submit This creates a button that automatically submits a form.
2. reset This creates a button that automatically resets form controls to their initial values.

PSEB 10th Class Computer Notes Chapter 3 HTML II

Multimedia in Html:

Multimedia can be added using HTML in many ways :

<Marquee>

An HTML marquee is a scrolling piece of text displayed either horizontally across or vertically*down your webpage depending on the settings. This is created by using HTML <marquees> tag.
Note – The <marquee> tag deprecated in HTML5. Do not use this element, instead you can use JavaScript and CSS to create such effects.

Syntax:
A simple syntax to use HTML <marquee> tag is as follows:
<marquee attribute_name = “attribute_value”….more attributes> ‘
One or more lines or text message or image </marquee>

The <marquee> Tag Attributes

Following is the list of important attributes which can be used with <marquee> tag:

Width:

This specifies the width of the marquee. This can be a value like 10 or 20% etc. height. This specifies the height of the marquee. This can be a value like 10 or 20% etc. direction. This specifies the direction in which marquee should scroll. This can be a value like up, down, left or right, behavior. This specifies the type of scrolling of the marquee. This can have a value like scroll, slide and alternate, scrolldelay. This specifies how long to delay between each jump.

This will have a value like 10 etc. scrollamount. This specifies the speed of marquee text. This can have a value like 10 etc, loop. This specifies how many times to loop. The default value is INFINITE, which means that the marquee loops endlessly, bgcolor. This specifies background color in terms of color name or color hex value, shspace. This specifies horizontal space around the marquee. This can be a value like 10 or 20% etc. vspace. This specifies vertical space around the marquee. This can be a value like 10 or 20% etc.

PSEB 10th Class Computer Notes Chapter 3 HTML II

Adding Audio/Video files in HTML:

User can link audio/video files in HTML document using anchor (<a>) tag. User has to give the path of audio/video file in href attribute of anchor tag. Whenever the user clicks on the link, the files will automatically gets downloaded and is played in the associated software.

PSEB 8th Class Social Science Notes Chapter 14 Handicraft and Industry

This PSEB 8th Class Social Science Notes Chapter 14 Handicraft and Industry will help you in revision during exams.

Handicraft and Industry PSEB 8th Class SST Notes

→ Cottage of Industries of India: India was known for its cottage industries from ancient times. But these industries declined during the British rule.

→ Reasons for the decline of cottage industries:

  • End of local rule
  • Machine-made goods were of good quality and cheap as well
  • People of new classes liked the machine-made goods, goods of cottage industries were expensive, sending Indian raw materials to Britain.

PSEB 8th Class Social Science Notes Chapter 14 Handicraft and Industry

→ Establishment of modern industries: New (modern) industries were established during British rule such as-Cotton textile, jute, coal, Tea, Iron, matchstick, etc.

→ Factory Acts: Laborers started to be exploited in new industries. The government passed Factory Acts to improve their condition.

हस्तशिल्प तथा उद्योग PSEB 8th Class SST Notes

→ भारत के लघु उद्योग – भारत प्राचीनकाल से ही अपने लघु उद्योगों के लिए जाना जाता रहा है। परन्तु अंग्रेज़ी काल में इन उद्योगों का पतन हो गया।

→ लघु-उद्योगों के पतन के कारण-

  • देशी रियासतों की समाप्ति
  • (मशीनी माल का साफ़-सुथरा तथा सस्ता होना
  • नई श्रेणी के लोगों को मशीनी माल पसन्द होना,
  • लघु उद्योगों में तैयार माल का महंगा होना,
  • भारत से कच्चा माल इंग्लैंड में भेजा जाना आदि।

→ आधुनिक उद्योगों की स्थापना – अंग्रेज़ी काल में स्थापित नए (आधुनिक) उद्योग थे-सूती कपड़ा, पटसन, कोयला, चाय, कॉफ़ी, लौह-इस्पात, दियासलाई आदि।

→ फैक्टरी एक्ट्स – नये उद्योगों में मजदूरों का शोषण होने लगा। उनकी दशा सुधारने के लिए सरकार ने फैक्टरी एक्ट्स पास किये।

ਦਸਤਕਾਰੀ ਅਤੇ ਉਦਯੋਗ PSEB 8th Class SST Notes

→ ਭਾਰਤ ਦੇ ਲਘੂ ਉਦਯੋਗ-ਭਾਰਤ ਪ੍ਰਾਚੀਨ ਕਾਲ ਤੋਂ ਹੀ ਆਪਣੇ ਲਘੂ ਉਦਯੋਗਾਂ ਲਈ ਜਾਣਿਆ ਜਾਂਦਾ ਰਿਹਾ ਹੈ, ਪਰ ਅੰਗਰੇਜ਼ੀ ਕਾਲ ਵਿਚ ਇਨ੍ਹਾਂ ਉਦਯੋਗਾਂ ਦਾ ਪਤਨ ਹੋ ਗਿਆ ।

→ ਲਘੂ ਉਦਯੋਗਾਂ ਦੇ ਪਤਨ ਦੇ ਕਾਰਨ-

  • ਦੇਸੀ ਰਿਆਸਤਾਂ ਦੀ ਸਮਾਪਤੀ ।
  • ਮਸ਼ੀਨੀ ਮਾਲ ਦਾ ਸਾਫ਼-ਸੁਥਰਾ ਅਤੇ ਸਸਤਾ ਹੋਣਾ ।
  • ਨਵੀਂ ਸ਼੍ਰੇਣੀ ਦੇ ਲੋਕਾਂ ਨੂੰ ਮਸ਼ੀਨੀ ਮਾਲ ਪਸੰਦ ਹੋਣਾ ।
  • ਲਘੂ ਉਦਯੋਗਾਂ ਵਿਚ ਤਿਆਰ ਮਾਲ ਦਾ ਮਹਿੰਗਾ ਹੋਣਾ ।
  • ਭਾਰਤ ਤੋਂ ਕੱਚਾ ਮਾਲ ਇੰਗਲੈਂਡ ਵਿਚ ਭੇਜਿਆ ਜਾਣਾ ਆਦਿ ।

→ ਆਧੁਨਿਕ ਉਦਯੋਗਾਂ ਦੀ ਸਥਾਪਨਾ-ਅੰਗਰੇਜ਼ੀ ਕਾਲ ਵਿਚ ਸਥਾਪਿਤ ਨਵੇਂ ਆਧੁਨਿਕ ਉਦਯੋਗ ਸਨ-ਸੂਤੀ ਕੱਪੜਾ, ਪਟਸਨ, ਕੋਇਲਾ, ਚਾਹ, ਕਾਫੀ, ਲੋਹਾ-ਇਸਪਾਤ, ਮਾਚਿਸ ਦੀਆਂ ਤੀਲੀਆਂ (ਦੀਆਸਲਾਈ) ਆਦਿ ।

→ ਫੈਕਟਰੀ ਐਕਟਜ਼-ਨਵੇਂ ਉਦਯੋਗਾਂ ਵਿਚ ਮਜ਼ਦੂਰਾਂ ਦਾ ਸ਼ੋਸ਼ਣ ਹੋਣ ਲੱਗਾ ਉਨ੍ਹਾਂ ਦੀ ਦਸ਼ਾ ਸੁਧਾਰਨ ਲਈ ਸਰਕਾਰ ਨੇ ਫੈਕਟਰੀ ਐਕਟਜ਼ ਪਾਸ ਕੀਤੇ ।

PSEB 9th Class SST Notes Geography Chapter 3a India: Drainage

This PSEB 9th Class Social Science Notes Geography Chapter 3a India: Drainage will help you in revision during exams.

India: Drainage PSEB 9th Class SST Notes

→ Drainage system: Major rivers and their tributaries of a particular region form a definite pattern of drainage. This pattern is called the drainage system of that region.

→ Tributaries: The river which gets submerged in the main river is called the tributary of that main river.

→ Major Rivers of India: Major rivers of India can be divided into two main parts i.e. Himalayan rivers and rivers of Peninsular Plateau.

→ Major Himalayan rivers are Indus, Ganga and Brahmaputra. The major rivers of the peninsular plateau are Kaveri, Krishna, Godavari, Tapti, and Narmada.

PSEB 9th Class SST Notes Geography Chapter 3a India: Drainage

→ Lakes: Major lakes in India are Dal, Wooler, Sambhar, Chilka, Pulikat, etc.

→ They get water either from rain or from the melting ice of glaciers.

→ Few lakes are quite important from an entertainment point of view.

→ Importance of Rivers: Rivers give us water to drink and for irrigation.

→ We can get hydroelectricity by making dams on rivers.

→ River pollution: Throwing of unnecessary particles and chemicals in river water creates river pollution. Then, this water is not fit for human consumption.

→ Ways to stop river pollution: Proper utilization of river water, making borders at agricultural fields and by making National Water Grid, we can stop river pollution.

भारत : जलप्रवाह PSEB 9th Class SST Notes

→ अप्रवाह प्रणाली-किसी प्रदेश की मुख्य नदी तथा उसकी सहायक नदियाँ मिलकर जल प्रवाह की एक विशेष रूपरेखा बनाती हैं। इसे अप्रवाह प्रणाली कहते हैं।

→ सहायक नदी-वह नदी जो अपने जल को मुख्य नदी में मिला देती है, उसे मुख्य नदी की सहायक नदी कहते हैं।

→ भारत की मुख्य नदियाँ-भारत की नदियों को मुख्य रूप से दो भागों में विभाजित किया जा सकता है-हिमालय की नदियाँ तथा प्रायद्वीपीय पठार की नदियाँ हिमालय की मुख्य नदियाँ सिंधु, गंगा तथा ब्रह्मपुत्र हैं।

→ प्रायद्वीपीय भारत की मुख्य नदियों में कावेरी, कृष्णा, गोदावरी, ताप्ती तथा नर्मदा के नाम लिए जा सकते हैं।

→ झीलें-भारत की प्रमुख झीलें डल, वूलर, सांभर, चिल्का, कोलेरू, पुलिकट इत्यादि हैं।

→ नदियों का महत्त्व नदियाँ पेयजल की आपूर्ति करती हैं, सिंचाई सुविधाएँ तथा परिवहन सुविधाएँ प्रदान करती हैं। नदियों पर बाँध बना कर जल विद्युत् भी प्राप्त की जाती है।

→ नदी-प्रदूषण-नदियों में गिरने वाले अपशिष्ट पदार्थों तथा रासायनिक पदार्थों रे नदियों का जल निरंतर प्रदूषित हो रहा है। यह जल पीने योग्य नहीं है।

→ नदी-प्रदूषण को रोकने के उपाय-नदी-जल के उचित प्रबंधन, खेतों की मेड़बंदी तथा राष्ट्रीय जल ग्रिड का निर्माण करके नदी के प्रदूषण को रोका जा सकता है।

ਭਾਰਤ : ਜਲ ਪ੍ਰਵਾਹ PSEB 9th Class SST Notes

→ ਕਿਸੇ ਦੇਸ਼ ਦੀ ਮੁੱਖ ਨਦੀ ਅਤੇ ਉਸਦੀਆਂ ਸਹਾਇਕ ਨਦੀਆਂ ਮਿਲ ਕੇ ਜਲ ਪ੍ਰਵਾਹ ਦੀ ਇੱਕ ਵਿਸ਼ੇਸ਼ ਰੂਪ-ਰੇਖਾ ਬਣਾਉਂਦੀ ਹੈ । ਇਸਨੂੰ ਜਲ ਪ੍ਰਵਾਹ ਪ੍ਰਣਾਲੀ ਕਹਿੰਦੇ ਹਨ ।

→ ਉਹ ਨਦੀ ਜਿਹੜੀ ਆਪਣੇ ਪਾਣੀ ਨੂੰ ਮੁੱਖ ਨਦੀ ਵਿੱਚ ਮਿਲਾਉਂਦੀ ਹੈ, ਉਸ ਨੂੰ ਮੁੱਖ ਨਦੀ ਦੀ ਸਹਾਇਕ ਨਦੀ ਕਹਿੰਦੇ ਹਨ ।

→ ਭਾਰਤ ਦੀਆਂ ਮੁੱਖ ਨਦੀਆਂ ਨੂੰ ਮੁੱਖ ਰੂਪ ਨਾਲ ਦੋ ਭਾਗਾਂ ਵਿੱਚ ਵੰਡਿਆ ਜਾ ਸਕਦਾ ਹੈ-ਹਿਮਾਲਿਆ ਦੀਆਂ ਨਦੀਆਂ ਅਤੇ ਪ੍ਰਾਇਦੀਪੀ ਪਠਾਰ ਦੀਆਂ ਨਦੀਆਂ ।

→ ਹਿਮਾਲਿਆ ਦੀਆਂ ਮੁੱਖ ਨਦੀਆਂ ਸਿੰਧੂ, ਗੰਗਾ ਅਤੇ ਬ੍ਰਹਮਪੁੱਤਰ ਹਨ । ਪ੍ਰਾਇਦੀਪੀ ਭਾਰਤ ਦੀਆਂ ਮੁੱਖ ਨਦੀਆਂ ਵਿੱਚ ਕਾਵੇਰੀ, ਕ੍ਰਿਸ਼ਨਾ, ਗੋਦਾਵਰੀ, ਤਾਪਤੀ ਅਤੇ ਨਰਮਦਾ ਦੇ ਨਾਮ ਲਏ ਜਾ ਸਕਦੇ ਹਨ ।

→ ਭਾਰਤ ਦੀਆਂ ਪ੍ਰਮੁੱਖ ਝੀਲਾਂ-ਡੁੱਲ, ਵੁਲਰ, ਸਾਂਭਰ, ਚਿਲਕਾ, ਪੁਲੀਕੱਟ ਆਦਿ ਹਨ । ਇਨ੍ਹਾਂ ਨੂੰ ਪਾਣੀ ਜਾਂ ਤਾਂ ਵਰਖਾ ਤੋਂ ਜਾਂ ਫਿਰ ਗਲੇਸ਼ੀਅਰ ਦੀ ਬਰਫ਼ ਪਿਘਲਣ ਨਾਲ ਮਿਲਦਾ ਹੈ । ਕਈ ਝੀਲਾਂ ਤਾਂ ਸੈਰ ਸਪਾਟੇ ਦੇ ਲਿਹਾਜ ਨਾਲ ਵੀ ਮਹੱਤਵਪੂਰਨ ਹਨ ।

→ ਨਦੀਆਂ ਪਾਣੀ ਦਿੰਦੀਆਂ ਹਨ, ਸਿੰਚਾਈ ਕਰਦੀਆਂ ਹਨ ਅਤੇ ਇਨ੍ਹਾਂ ਵਿੱਚ ਕਿਸ਼ਤੀਆਂ ਵੀ ਚਲਾਈਆਂ ਜਾਂਦੀਆਂ ਹਨ | ਨਦੀਆਂ ਉੱਤੇ ਡੈਮ ਬਣਾ ਕੇ ਇਨ੍ਹਾਂ ਤੋਂ ਪਣ-ਬਿਜਲੀ ਵੀ ਪ੍ਰਾਪਤ ਕੀਤੀ ਜਾਂਦੀ ਹੈ ।

→ ਨਦੀਆਂ ਵਿੱਚ ਸੁੱਟਣ ਵਾਲੇ ਗੈਰ-ਜ਼ਰੂਰੀ ਪਦਾਰਥਾਂ ਅਤੇ ਰਸਾਇਣਿਕ ਪਦਾਰਥਾਂ ਨਾਲ ਨਦੀਆਂ ਦਾ ਪਾਣੀ ਲਗਾਤਾਰ ਗੰਦਾ ਹੋ ਰਿਹਾ ਹੈ ।

→ ਇਹ ਪਾਣੀ ਪੀਣ ਯੋਗ ਨਹੀਂ ਹੈ । ਹੁਣ ਤਾਂ ਇਹ ਗੱਲ ਵੀ ਸਾਹਮਣੇ ਆ ਰਹੀ ਹੈ ਕਿ ਕਈ ਸ਼ਹਿਰਾਂ ਦਾ ਪਾਣੀ ਵੀ ਪੀਣ ਯੋਗ ਨਹੀਂ ਹੈ ।

→ ਨਦੀਆਂ ਦੇ ਪਾਣੀ ਦੇ ਸਹੀ ਪ੍ਰਬੰਧਨ, ਖੇਤਾਂ ਦੀ ਹੱਦਬੰਦੀ ਅਤੇ ਰਾਸ਼ਟਰੀ ਜਲ ਗਰਿਡ ਨੂੰ ਬਣਾ ਕੇ ਨਦੀਆਂ ਦੇ ਪ੍ਰਦੂਸ਼ਣ ਨੂੰ ਰੋਕਿਆ ਜਾ ਸਕਦਾ ਹੈ ।

PSEB 10th Class SST Notes Civics Chapter 5 Indian Foreign Policy and United Nations

This PSEB 10th Class Social Science Notes Civics Chapter 5 Indian Foreign Policy and United Nations will help you in revision during exams.

Indian Foreign Policy and United Nations PSEB 10th Class SST Notes

Aims and objectives of the Foreign Policy:

  • Foreign Policy means the policy which a country adopts toward other countries to solve international problems.
  • Its main aim is to maintain the country’s security and world peace.

Basis of Foreign Policy of India:

  • The main aim of the foreign policy of India is Non-alignment.
  • This means that India remains aloof from military alliances or power blocs.
  • The basic principle of our foreign policy is to cooperate with the U.N.O. and to have friendly relations with neighbouring countries.

PSEB 10th Class SST Notes Civics Chapter 5 Indian Foreign Policy and United Nations

Non-Alignment movement:

  • It is the basic principle of India’s foreign policy.
  • India was the first country that initiates the policy of Non-alignment.
  • The founder members of this movement were India, Yugoslavia, and Egypt.
  • The membership of this movement has considerably increased.
  • Now, this movement is called Third World.

India and its neighbours:

  • Pakistan, China, Bangladesh, and Sri Lanka, Bhutan Myainmare are our neighbouring countries.
  • India aims at having good relations with these countries and our country has solved disputes with some countries.

India and Pakistan:
Pakistan has been claiming Kashmir since independence whereas it is an integral part of India.

India and China:

  • August 1962 invasion of India by China had created a rift between India and China.
  • But now there is some improvement in relations between the two countries as a result of meetings between the prominent leaders of India and China.

Relations with Bangla Desh:

  • The causes of disputes between the two countries were the boundary disputes, Farakha barrage, and migration of Bangladeshis to India.
  • The boundary disputes between the two countries have been solved by present governments.

PSEB 10th Class SST Notes Civics Chapter 5 Indian Foreign Policy and United Nations

Panchsheel:
On April 29, 1954, Pt. Jawaharlal Nehru, the then Prime Minister of India and P.M. of China, Chou-en-Lai formulated five principles of Panchsheel of co-existence for the nations of the world.

India’s relations with the U.S.A.:

  • India’s relations with the U.S.A. have been changing from time to time.
  • The main cause of tension was India’s refusal to sign a Non-proliferation treaty because this treaty is biased.
  • But now India has friendly relations with the U.S.A. Now both countries are fighting to eradicate Islamic terrorism.

India’s relations with Russia:

  • India has very good relations with Russia.
  • Russia has supported India on every issue.
  • Russia has contributed a lot to the improvement of India’s economy.

United Nations Organisation:

  • UNO was established on 24 October 1945 to stop wars and establish world peace.
  • It has six organs and many specialized agencies.
  • They have contributed to the development and progress of backward countries.

PSEB 10th Class SST Notes Civics Chapter 5 Indian Foreign Policy and United Nations

India and UNO:

  • India has full faith in the aims and principles of the UNO.
  • So the aim of the foreign policy in India is to support UNO in the establishment of world peace and solving international disputes through peaceful methods.

भारत की विदेश नीति तथा संयुक्त राष्ट्र PSEB 10th Class SST Notes

→ विदेश नीति का अर्थ तथा उद्देश्य-विदेश नीति से अभिप्राय उस नीति से है जो कोई देश दूसरे देशों के प्रति तथा प्रमुख अन्तर्राष्ट्रीय समस्याओं के प्रति अपनाता है। इसका मुख्य उद्देश्य देश की प्रतिरक्षा तथा विश्व शान्ति को बनाए रखना है।

भारत की विदेश नीति के आधार-भारत की विदेशी नीति का मुख्य आधार गुटनिरपेक्षता है। इसका अर्थ है कि भारत विश्व के सैनिक गुटों से दूर रहता है। हमारी विदेश नीति के आधार हैं-संयुक्त राष्ट्र से सहयोग तथा पड़ोसी राष्ट्रों से मैत्रीपूर्ण सम्बन्ध स्थापित करना।

→ गुट-निरपेक्ष आन्दोलन-गुट-निरपेक्ष आन्दोलन के आरम्भिक सदस्य भारत, यूगोस्लाविया तथा मिस्र थे। भारत के प्रधानमन्त्री पण्डित जवाहर लाल नेहरू, यूगोस्लाविया के राष्ट्रपति टीटो तथा मिस्र के राष्ट्रपति गमाल अब्दुल नासिर ने गुट-निरपेक्षता की नीति का समर्थन किया।

→ परन्तु आज इस नीति को अपनाने वाले देशों की संख्या बहुत अधिक हो गई है और इस नीति ने एक शक्तिशाली आन्दोलन का रूप धारण कर लिया है। इसी कारण गुट-निरपेक्ष देशों के समूह को ‘तृतीय विश्व’ या ‘तीसरी दुनिया’ कह कर पुकारा जाता है।

→ भारत तथा उसके पड़ोसी देश-हमारे मुख्य पड़ोसी देश पाकिस्तान, चीन, बांग्ला देश तथा श्रीलंका हैं। हमारे अन्य पड़ोसी भृटान, नेपाल तथा बर्मा (म्यनमार) हैं।

→ भारत इनके साथ अच्छे सम्बन्ध स्थापित करना चाहता है। परन्तु इनके साथ हमारे सम्बन्धों के कुछ नकारात्मक पहलू भी हैं।

→ भारत तथा पाकिस्तान-पाकिस्तान के साथ हमारे सम्बन्ध कभी भी सद्भावनापूर्ण नहीं रहे। इसके मुख्य कारण हैं-प्रथम, भारत एक धर्म-निरपेक्ष राज्य है, जबकि पाकिस्तान एक इस्लामी राज्य है। द्वितीय, कश्मीर के मामले पर दोनों देशों में मतभेद हैं।

→ भारत तथा चीन-1962 में चीन द्वारा भारत पर आक्रमण के पश्चात् भारत-चीन सम्बन्धों में कटुता आ गई। आज सीमा पर चीन की घुसपैठ के प्रयासों के कारण दोनों देशों के बीच तनाव बना हुआ है।

→ भारत-बांग्ला देश सम्बन्ध-दोनों देशों में सीमावाद, बांग्ला शरणार्थियों की भारत में घुसपैठ की समस्या तथा फरक्का बांध की समस्या तनाव के कारण थे। परन्तु 1996 में गंगा जल के बंटवारे पर हुए समझौते के पश्चात् दोनों देशों में सहयोग की आशा बढ़ गई।

→ पंचशील-पण्डित जवाहरलाल नेहरू ने विश्व शान्ति के लिए पांच सिद्धान्त बनाए। इसे पंचशील का नाम दिया गया है। इसका उद्देश्य पड़ोसी देशों के बीच सह-अस्तित्व की भावना को बढ़ाना है ताकि उनकी प्रभुसत्ता और अखण्डता बनी रहे।

→ भारत और संयुक्त राज्य अमेरिका-भारत के साथ अमेरिका के सम्बन्धों में उतार-चढ़ाव आता रहा है। तनाव का एक मुख्य कारण है- भारत द्वारा “परमाणु अप्रसार” सन्धि पर हस्ताक्षर न करना, क्योंकि यह सन्धि भेदभावपूर्ण है। फिर भी संयुक्त राज्य अमेरिका भारत को आर्थिक सहायता देने वाला प्रमुख देश है।

→ भारत और रूस-रूस के साथ भारत के सम्बन्ध सदा ही अच्छे रहे हैं। यह देश भारत को हर पक्ष में सहयोग देता रहा है। हमारी स्वतन्त्रता तथा हमारे आर्थिक विकास में रूस का अत्यधिक योगदान रहा है।

→ संयुक्त राष्ट्र-संयुक्त राष्ट्र की स्थापना (24 अक्तूबर, 1945) युद्धों को रोकने तथा विश्व शान्ति बनाए रखने के लिए हुई। इसके छ: अंग तथा इसकी विशिष्ट समितियां विश्व-शान्ति, जनकल्याण तथा पिछड़े राष्ट्रों के आर्थिक विकास में महत्त्वपूर्ण भूमिका निभा रही हैं।

→ भारत तथा संयुक्त राष्ट्र भारत की संयुक्त राष्ट्र के उद्देश्यों में पूरी आस्था है। इसलिए भारत की विदेश नीति का एक लक्ष्य संयुक्त राष्ट्र को विश्व शान्ति की स्थापना तथा विवादों को आपसी बातचीत द्वारा सुलझाने में समर्थन देना भी है। इस प्रकार भारत संयुक्त राष्ट्र के माध्यम से विश्व शान्ति में महत्त्वपूर्ण योगदान दे रहा है।

ਭਾਰਤ ਦੀ ਵਿਦੇਸ਼ ਨੀਤੀ ਅਤੇ ਸੰਯੁਕਤ ਰਾਸ਼ਟਰ PSEB 10th Class SST Notes

→ ਵਿਦੇਸ਼ ਨੀਤੀ ਦਾ ਅਰਥ ਤੇ ਉਦੇਸ਼-ਵਿਦੇਸ਼ ਨੀਤੀ ਤੋਂ ਭਾਵ ਉਸ ਨੀਤੀ ਤੋਂ ਹੈ ਜਿਹੜਾ ਕੋਈ ਦੇਸ਼ ਦੂਸਰੇ ਦੇਸ਼ਾਂ ਦੇ ਪ੍ਰਤੀ ਅਤੇ ਮੁੱਖ ਅੰਤਰ-ਰਾਸ਼ਟਰੀ ਸਮੱਸਿਆਵਾਂ ਦੇ ਪ੍ਰਤੀ ਅਪਣਾਉਂਦਾ ਹੈ । ਇਸ ਦਾ ਮੁੱਖ ਉਦੇਸ਼ ਦੇਸ਼ ਦੀ ਸੁਰੱਖਿਆ ਅਤੇ ਵਿਸ਼ਵ ਅਮਨ ਨੂੰ ਬਣਾਈ ਰੱਖਣਾ ਹੈ ।

→ ਭਾਰਤ ਦੀ ਵਿਦੇਸ਼ ਨੀਤੀ ਦੇ ਆਧਾਰ-ਭਾਰਤ ਦੀ ਵਿਦੇਸ਼ੀ ਨੀਤੀ ਦਾ ਮੁੱਖ ਆਧਾਰ ਗੁੱਟ-ਨਿਰਲੇਪਤਾ ਹੈ । ਇਸ ਦਾ ਅਰਥ ਇਹ ਹੈ ਕਿ ਭਾਰਤ ਵਿਸ਼ਵ ਦੇ ਸੈਨਿਕ ਗੁੱਟਾਂ ਤੋਂ ਦੂਰ ਰਹਿੰਦਾ ਹੈ । ਸਾਡੀ ਵਿਦੇਸ਼ ਨੀਤੀ ਦੇ ਹੋਰ ਆਧਾਰ ਹਨ-ਸੰਯੁਕਤ ਰਾਸ਼ਟਰ ਨਾਲ ਸਹਿਯੋਗ ਅਤੇ ਗੁਆਂਢੀ ਰਾਸ਼ਟਰਾਂ ਨਾਲ ਦੋਸਤਾਨਾ ਸੰਬੰਧ ਕਾਇਮ ਕਰਨਾ ।

→ ਗੁੱਟ-ਨਿਰਲੇਪ ਲਹਿਰ-ਗੁੱਟ-ਨਿਰਲੇਪ ਲਹਿਰ ਦੇ ਮੁੱਢਲੇ ਮੈਂਬਰ, ਭਾਰਤ, ਯੂਗੋਸਲਾਵੀਆ ਅਤੇ ਮਿਸਰ ਸਨ । ਭਾਰਤ ਦੇ ਪ੍ਰਧਾਨ ਮੰਤਰੀ ਪੰਡਿਤ ਜਵਾਹਰ ਲਾਲ ਨਹਿਰੂ, ਯੂਗੋਸਲਾਵੀਆ ਦੇ ਰਾਸ਼ਟਰਪਤੀ ਮਾਰਸ਼ਲ ਟੀਟੋ ਅਤੇ ਮਿਸਰ ਦੇ ਰਾਸ਼ਟਰਪਤੀ ਗਮਾਲ ਅਬਦੁੱਲ ਨਾਸਿਰ ਨੇ ਗੁੱਟ-ਨਿਰਲੇਪਤਾ ਦੀ ਨੀਤੀ ਦਾ ਸਮਰਥਨ ਕੀਤਾ ।

→ ਪਰ ਅੱਜ ਇਸ ਨੀਤੀ ਨੂੰ ਅਪਣਾਉਣ ਵਾਲੇ ਦੇਸ਼ਾਂ ਦੀ ਗਿਣਤੀ ਬਹੁਤ ਜ਼ਿਆਦਾ ਹੋ ਗਈ ਹੈ ਅਤੇ ਇਸ ਨੀਤੀ ਨੇ ਇਕ ਸ਼ਕਤੀਸ਼ਾਲੀ ਲਹਿਰ ਦਾ ਰੂਪ ਧਾਰਨ ਕਰ ਲਿਆ ਹੈ । ਇਸੇ ਕਾਰਨ ਗੁੱਟ-ਨਿਰਲੇਪ ਦੋਸ਼ਾਂ ਦੇ ਸਮੂਹਾਂ ਨੂੰ ਤੀਸਰਾ ਵਿਸ਼ਵ ਜਾਂ ਤੀਜੀ ਦੁਨੀਆਂ ਆਖ ਕੇ ਬੁਲਾਇਆ ਜਾਂਦਾ ਹੈ ।

→ ਭਾਰਤ ਅਤੇ ਇਸ ਦੇ ਗੁਆਂਢੀ ਦੇਸ਼-ਸਾਡੇ ਮੁੱਖ ਗੁਆਂਢੀ ਦੇਸ਼ ਪਾਕਿਸਤਾਨ, ਚੀਨ, ਬੰਗਲਾਦੇਸ਼ ਅਤੇ ਸ੍ਰੀਲੰਕਾ ਹਨ । ਸਾਡੇ ਹੋਰ ਗੁਆਂਢੀ ਦੇਸ਼, ਭੂਟਾਨ, ਨੇਪਾਲ ਅਤੇ ਮਾਲਦੀਵ ਹਨ । ਭਾਰਤ ਇਨ੍ਹਾਂ ਨਾਲ ਚੰਗੇ ਸੰਬੰਧ ਕਾਇਮ ਕਰਨਾ ਚਾਹੁੰਦਾ ਹੈ । ਪਰ ਇਨ੍ਹਾਂ ਨਾਲ ਸਾਡੇ ਤਣਾਅਪੂਰਨ ਸੰਬੰਧਾਂ ਦੇ ਕੁੱਝ ਸਕਾਰਾਤਮਕ ਪਹਿਲੂ ਵੀ ਹਨ ।

→ ਭਾਰਤ ਅਤੇ ਪਾਕਿਸਤਾਨ-ਪਾਕਿਸਤਾਨ ਦੇ ਨਾਲ ਸਾਡੇ ਸੰਬੰਧ ਕਦੀ ਵੀ ਸਦਭਾਵਨਾਪੂਰਨ ਨਹੀਂ ਰਹੇ । ਇਸ ਦੇ ਮੁੱਖ ਕਾਰਨ ਹਨ-ਪਹਿਲਾ, ਭਾਰਤ ਇਕ ਧਰਮ-ਨਿਰਪੇਖ ਰਾਜ ਹੈ। ਜਦਕਿ ਪਾਕਿਸਤਾਨ ਇਕ ਇਸਲਾਮੀ ਰਾਜ ਹੈ । ਦੂਜਾ, ਕਸ਼ਮੀਰ ਦੇ ਮਸਲੇ ਉੱਤੇ ਦੋਹਾਂ ਦੇਸ਼ਾਂ ਵਿਚਕਾਰ ਮਤਭੇਦ ਹਨ ।

→ ਭਾਰਤ ਤੇ ਚੀਨ-ਸੰਨ 1962 ਵਿਚ ਚੀਨ ਵਲੋਂ ਭਾਰਤ ਉੱਤੇ ਹਮਲਾ ਕਰਨ ਤੋਂ ਪਿੱਛੋਂ ਭਾਰਤ-ਚੀਨ ਸੰਬੰਧਾਂ ਵਿਚ ਕੁੜੱਤਣ ਆ ਗਈ ਸੀ । ਅੱਜ ਸੀਮਾ ‘ਤੇ ਚੀਨ ਦੇ ਪ੍ਰਵੇਸ਼ ਦੇ ਯਤਨਾਂ ਦੇ ਕਾਰਨ ਦੋਵਾਂ ਦੇਸ਼ਾਂ ਵਿਚ ਤਣਾਓ ਬਣਿਆ ਹੋਇਆ ਹੈ ।

→ ਭਾਰਤ-ਬੰਗਲਾਦੇਸ਼ ਸੰਬੰਧ-ਦੋਹਾਂ ਦੋਸ਼ਾਂ ਵਿਚਕਾਰ ਸੀਮਾ ਵਿਵਾਦ, ਬੰਗਲਾ ਸ਼ਰਨਾਰਥੀਆਂ ਦੀ ਭਾਰਤ ਵਿਚ ਘੁਸਪੈਠ ਦੀ ਸਮੱਸਿਆ ਅਤੇ ਫ਼ਰੱਖਾ ਬੰਨ੍ਹ ਦੀ ਸਮੱਸਿਆ ਤਣਾਓ ਦੇ ਕਾਰਨ ਸਨ । ਪਰ 1996 ਵਿਚ ਗੰਗਾ ਦਰਿਆ ਦੇ ਪਾਣੀ ਦੀ ਵੰਡ ਉੱਤੇ ਹੋਏ · ਸਮਝੌਤੇ ਤੋਂ ਪਿੱਛੋਂ ਦੋਹਾਂ ਦੇਸ਼ਾਂ ਵਿਚ ਸਹਿਯੋਗ ਦੀ ਆਸ ਵੱਧ ਗਈ ।

→ ਪੰਚਸ਼ੀਲ-ਪੰਡਿਤ ਜਵਾਹਰ ਲਾਲ ਨਹਿਰੂ ਨੇ ਵਿਸ਼ਵ ਸ਼ਾਂਤੀ ਲਈ ਪੰਜ ਸਿਧਾਂਤ ਬਣਾਏ । ਇਸ ਨੂੰ ਪੰਚਸ਼ੀਲ ਦਾ ਨਾਂ ਦਿੱਤਾ ਜਾਂਦਾ ਹੈ । ਇਸ ਦਾ ਉਦੇਸ਼ ਗੁਆਂਢੀ ਦੇਸ਼ਾਂ ਵਿਚ ਸਹਿ-ਹੋਂਦ ਦੀ ਭਾਵਨਾ ਨੂੰ ਵਧਾਉਣਾ ਹੈ ਤਾਂ ਕਿ ਉਨ੍ਹਾਂ ਦੀ ਪ੍ਰਭੂਸੱਤਾ ਅਤੇ ਅਖੰਡਤਾ ਬਣੀ ਰਹੇ ।

→ ਭਾਰਤ ਅਤੇ ਸੰਯੁਕਤ ਰਾਜ ਅਮਰੀਕਾ-ਭਾਰਤ ਦੇ ਨਾਲ ਅਮਰੀਕਾ ਦੇ ਸੰਬੰਧਾਂ ਵਿਚ ਉਤਾਰ-ਚੜ੍ਹਾਅ ਆਉਂਦਾ ਰਿਹਾ। ਹੈ । ਤਣਾਓ ਦਾ ਇਕ ਹੋਰ ਕਾਰਨ ਹੈ-ਭਾਰਤ ਵਲੋਂ ਪ੍ਰਮਾਣੂ ਅਪ੍ਰਸਾਰ ਸੰਧੀ ਉੱਤੇ ਦਸਤਖ਼ਤ ਨਾ ਕਰਨਾ, ਕਿਉਂਕਿ ਇਹ ਸੰਧੀ ਭੇਦ-ਭਾਵ ਪੂਰਨ ਹੈ । ਫਿਰ ਵੀ ਸੰਯੁਕਤ ਰਾਜ ਅਮਰੀਕਾ ਭਾਰਤ ਨੂੰ ਆਰਥਿਕ ਮੱਦਦ ਦੇਣ ਵਾਲਾ ਮੁੱਖ ਦੇਸ਼ ਹੈ ।

→ ਭਾਰਤ ਅਤੇ ਰੂਸ-ਰੂਸ ਦੇ ਨਾਲ ਭਾਰਤ ਦੇ ਸੰਬੰਧ ਸਦਾ ਹੀ ਚੰਗੇ ਰਹੇ ਹਨ । ਇਹ ਦੇਸ਼ ਭਾਰਤ ਨੂੰ ਹਰ ਪੱਖ ਵਿਚ ਸਹਿਯੋਗ ਦਿੰਦਾ ਰਹਿੰਦਾ ਹੈ । ਸਾਡੀ ਸੁਤੰਤਰਤਾ ਅਤੇ ਸਾਡੇ ਆਰਥਿਕ ਵਿਕਾਸ ਵਿਚ ਰੂਸ ਦਾ ਬਹੁਤ ਜ਼ਿਆਦਾ ਯੋਗਦਾਨ ਰਿਹਾ ਹੈ ।

→ ਸੰਯੁਕਤ ਰਾਸ਼ਟਰ-ਸੰਯੁਕਤ ਰਾਸ਼ਟਰ ਦੀ ਸਥਾਪਨਾ 24 ਅਕਤੂਬਰ, 1945 ਨੂੰ ਯੁੱਧਾਂ ਨੂੰ ਰੋਕਣ ਅਤੇ ਵਿਸ਼ਵ ਸ਼ਾਂਤੀ ਨੂੰ ਬਣਾਈ ਰੱਖਣ ਲਈ ਹੋਈ । ਇਸ ਦੇ ਛੇ ਅੰਗ ਅਤੇ ਇਸ ਦੀਆਂ ਦਸ ਵਿਸ਼ੇਸ਼ ਕਮੇਟੀਆਂ ਵਿਸ਼ਵ ਸ਼ਾਂਤੀ, ਜਨ-ਕਲਿਆਣ ਅਤੇ ਪੱਛੜੇ ਰਾਸ਼ਟਰਾਂ ਦੇ ਆਰਥਿਕ ਵਿਕਾਸ ਵਿਚ ਮਹੱਤਵਪੂਰਨ ਭੂਮਿਕਾ ਨਿਭਾ ਰਹੀਆਂ ਹਨ ।

→ ਭਾਰਤ ਅਤੇ ਸੰਯੁਕਤ ਰਾਸ਼ਟਰ-ਭਾਰਤ ਦੀ ਸੰਯੁਕਤ ਰਾਸ਼ਟਰ ਦੇ ਉਦੇਸ਼ਾਂ ਵਿਚ ਪੂਰੀ ਸ਼ਰਧਾ ਹੈ । ਇਸ ਲਈ ਭਾਰਤ ਦੀ ਵਿਦੇਸ਼ ਨੀਤੀ ਦਾ ਇਕ ਉਦੇਸ਼ ਸੰਯੁਕਤ ਰਾਸ਼ਟਰ ਨੂੰ ਵਿਸ਼ਵ-ਸ਼ਾਂਤੀ ਦੀ ਸਥਾਪਨਾ ਅਤੇ ਝਗੜਿਆਂ ਨੂੰ ਆਪਸੀ ਗੱਲਬਾਤ ਰਾਹੀਂ ਸੁਲਝਾਉਣ ਵਿਚ ਸਮਰਥਨ ਦੇਣਾ ਵੀ ਹੈ । ਇਸ ਤਰ੍ਹਾਂ ਭਾਰਤ ਸੰਯੁਕਤ ਰਾਸ਼ਟਰ ਦੇ ਮਾਧਿਅਮ ਰਾਹੀਂ ਵਿਸ਼ਵ-ਸ਼ਾਂਤੀ ਵਿਚ ਮਹੱਤਵਪੂਰਨ ਯੋਗਦਾਨ ਦੇ ਰਿਹਾ ਹੈ ।